
Last Updated on May 28, 2025 by Holly Lanier
I designed these sweet little pumpkins back in 2021, right after my husband and I got married. They marked the beginning of a new era for me, both in my personal and business life. I hope that you enjoy this mini pumpkin amigurumi pattern! These uniquely shaped pumpkins would be great for teachers as back-to-school gifts. You could also make these pumpkins without faces if you prefer a more natural look!
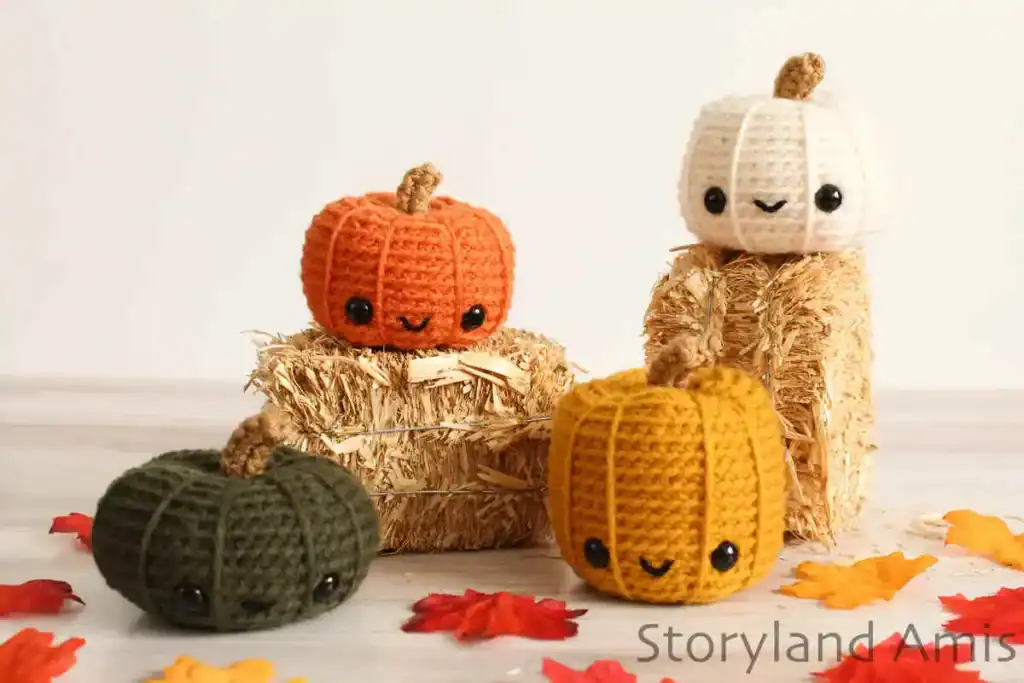
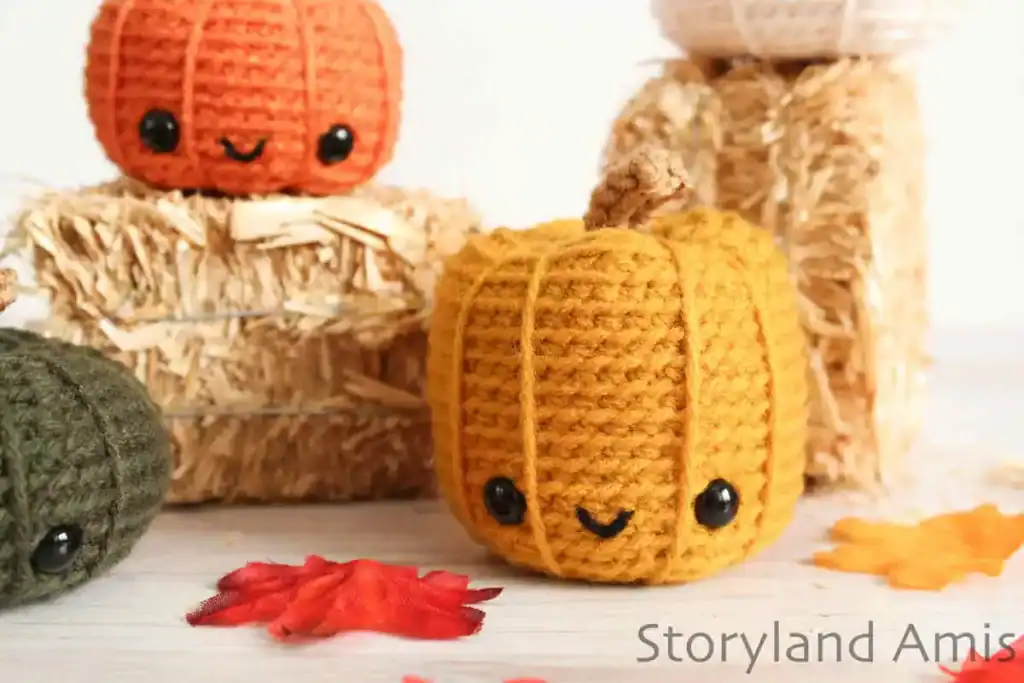
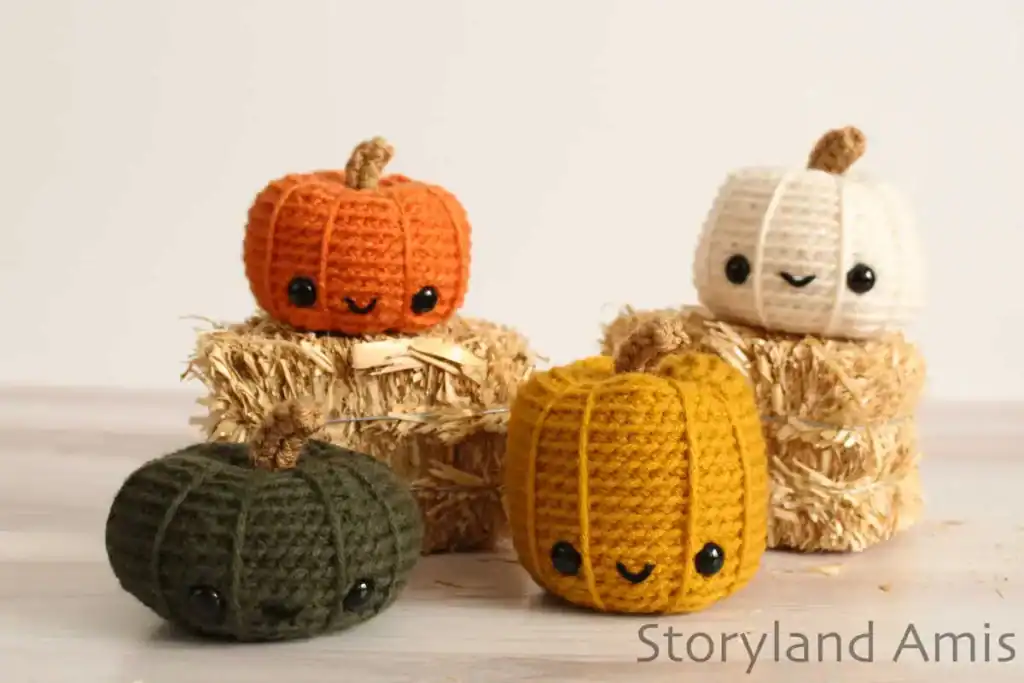
Meet the mini pumpkin gang! These cuties are ready to fill your home with pumpkin spice and all the joy that Fall brings! Each little pumpkin is unique in size, shape, and color, making a perfectly pleasing arrangement for your home!
You can purchase a printable, ad-free, beautifully formatted, concise version of this mini pumpkin amigurumi pattern in my shop HERE. Otherwise, please keep scrolling down for the free version!
Disclaimer: Some links in this free mini pumpkin amigurumi pattern may be affiliate links. Affiliate links are a way for me to make a small commission on certain products at no extra cost to you!
Materials You Need to Make These Mini Pumpkins
- Worsted-weight yarn (4-ply) in orange, green, white, yellow, and brown. (The U.K. equivalent is Aran, and AUS/NZ is 8 ply.) For my orange pumpkin, I used Red Heart Super Saver in the color “Carrot“. For the green, white, and yellow pumpkins, I used Impeccable Solid Yarn by Loops & Threads in the colors “Deep Forest“, “Aran“, and “Gold“.
- G (4 mm) crochet hook
- 4 sets of 9 mm black safety eyes
- Fiberfill (or your stuffing of choice)
- Bent tip tapestry needle
- Extra-long tapestry needle
- Scissors
- Stitch marker
- Straight pins
- Black embroidery floss
Abbreviation Key
Abbreviations are in U.S. terms.
- sc – single crochet
- st/sts – stitch(es)
- sl st – slip stitch
- dec – decrease (join the next 2 stitches together)
- inc – increase (2 single crochet in the next stitch)
- BLO – back loops only
- R1 – round 1
- rep – repeat
- ** – repeat the group of instructions between the asterisks the number of times indicated.
Note: All rounds are worked continuously (that is, vs. joined rounds.)
The finished size is approximately 2.5 (6.5 cm) – 3.5 in. (9 cm) tall (depending on the pumpkin made). (Please be aware that your personal gauge, tension, hook size, and the brand of yarn you decide to use will all impact the finished size.)
The pattern and images in this document are the sole property of Storyland Amis. This written pattern is for personal use only. Please do not share, sell, or redistribute it in whole or part.
You MAY sell the finished product, but please credit Storyland Amis as the designer. If you sell your finished items online, I would appreciate it if you could link them to my blog! You may not mass-produce items made from this pattern. Thank you for your understanding and respect.
Important Additional Info
Starting round: When starting my crochet pieces in the round, I always use the “ch 2 method.” That is perfectly fine if you prefer to start your pieces using the magic circle/ring instead. These two methods are interchangeable, and the end result will be the same regardless of your choice. Watch this short video to learn how to make the “ch 2 method”.
Right vs. wrong side: When working in the round, I always crochet with the “right” side of the stitches facing out. Watch my short video to see the difference between the “right” and “wrong” side of crochet stitches.
Yarn under vs. yarn over: I always yarn under (YU) instead of yarn over (YO) for all my amigurumi. Doing YO might make your amigurumi slightly larger than mine, so keep that in mind if you prefer YO. Watch my video on the differences between yarn under and yarn over.
Sewing pieces together: I sew all my pieces together using the whipstitch unless otherwise specified.
Stuffing: Check out my short video on how to stuff pieces properly here.
Color changes: Insert hook into last st of round or section with old color, yarn over & pull hook through st. Take your new color of yarn, yarn over & pull hook through remaining 2 loops on hook. Now you’re ready to start the new round or section. Check out my video on color changes here.
Free Mini Pumpkin Amigurumi Pattern
Stem for all pumpkins (make 4 using brown yarn)
Stem is worked in rows instead of rounds
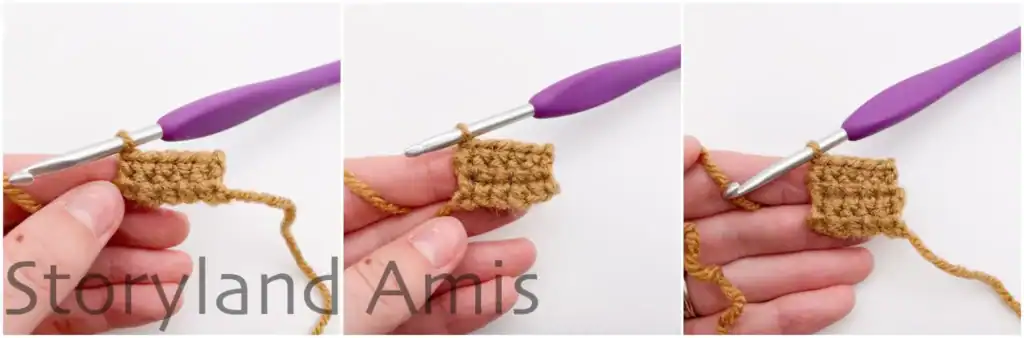
R1: ch 6, starting in 2nd ch from the hook, sc 5, ch 1, turn
R2-4: sc in all 5 sts (5 sts), ch 1, turn (see pic. #1)

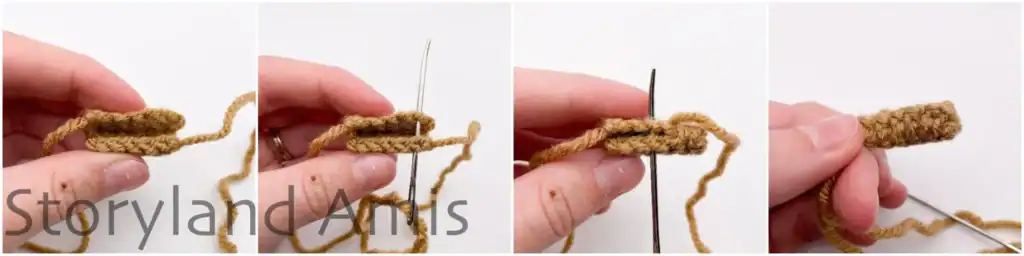
Finish off leaving a long tail for sewing. Fold the square in half and sew the two ends together to create a tube shape (see pic. #2).
Set the stems aside until all the pumpkin bodies are completed and the ridges have been created. Once the pumpkins are ready, use the remaining tail to sew the stem to the top of the pumpkin (see pic. #3). Weave in all ends. Watch this video to learn how to sew the stems to the pumpkins.
Orange pumpkin (using orange yarn)
***NOTE: All four pumpkin bodies are worked entirely in the back loops only (BLO). Since all rounds are worked in the BLO I will not specify this before each round. It is just understood that all rounds are to be worked in the BLO.
(All rounds are worked in the back loops only)
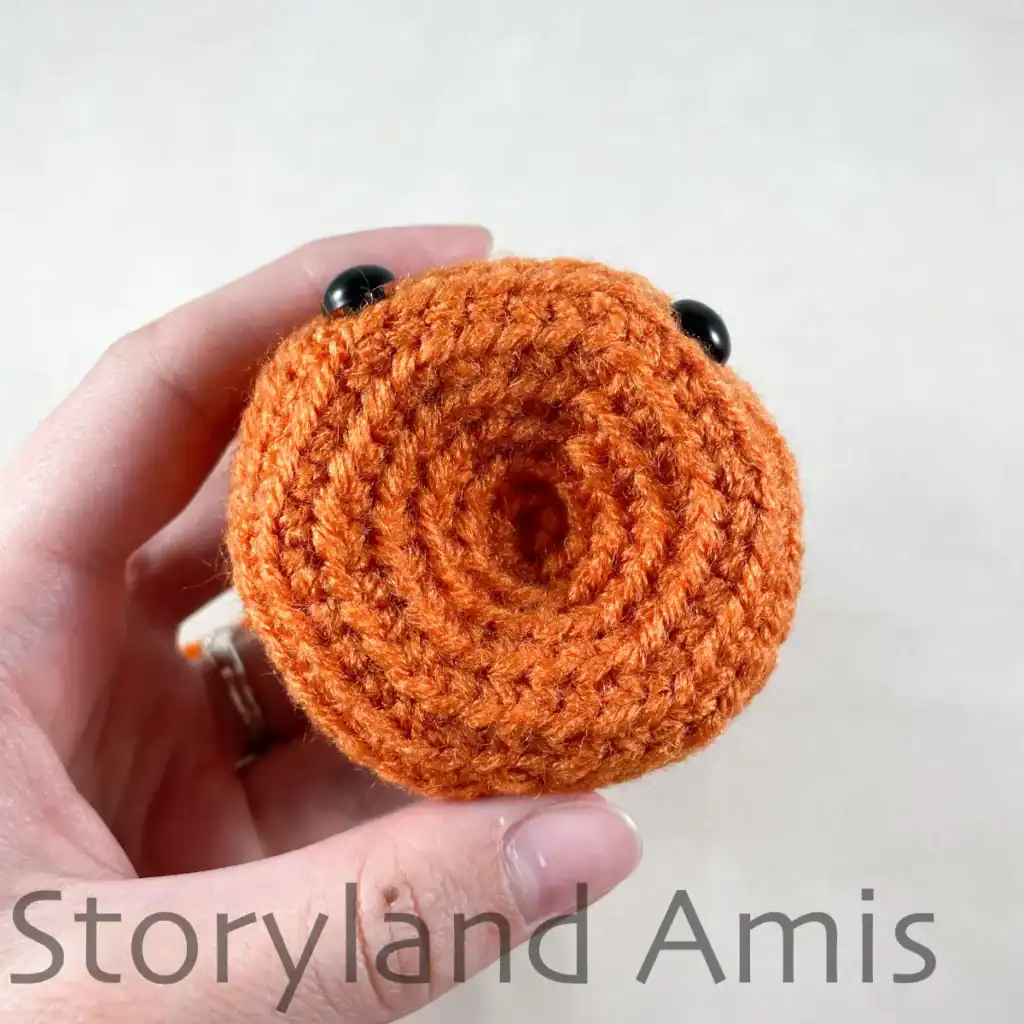
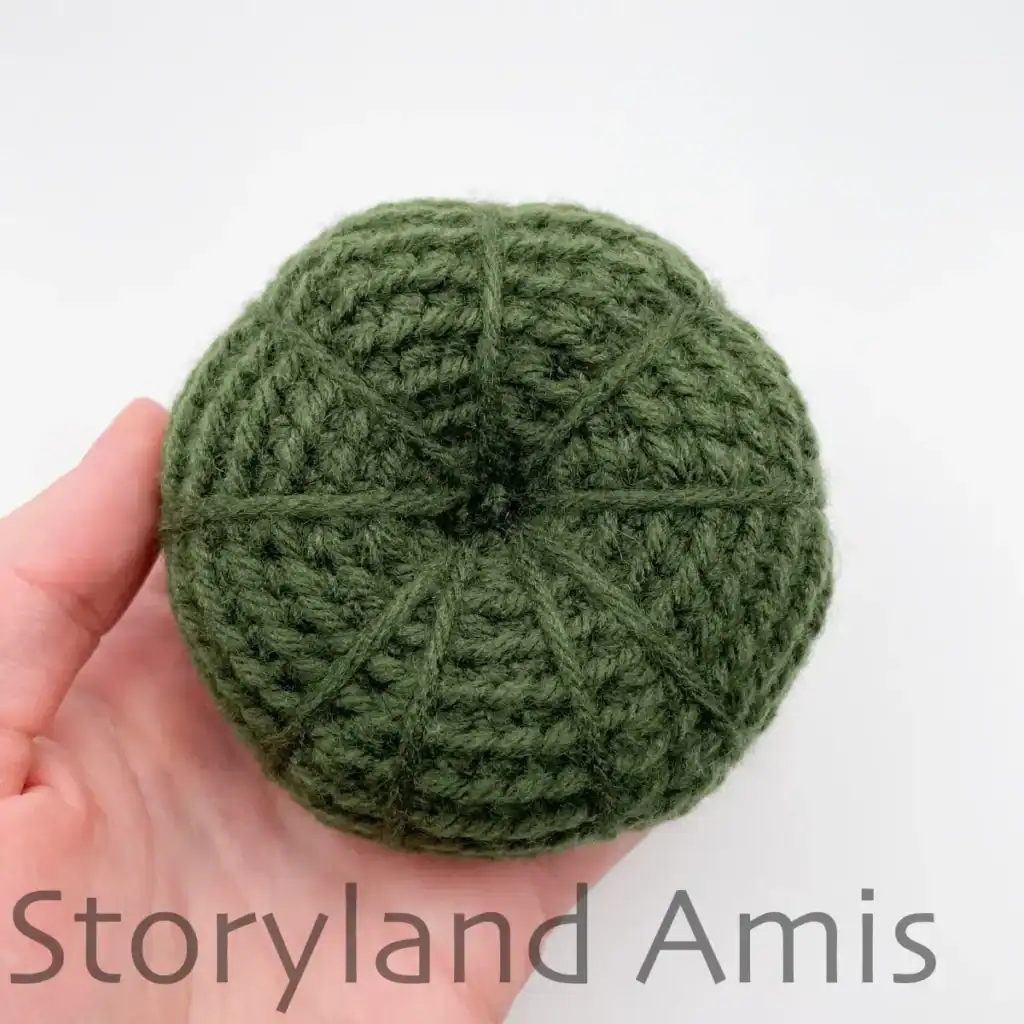
Because we will be working in the BLO, our little pumpkin will naturally indent in the center (see pic. #4). This is totally normal and works in our favor since we want both the bottom and top of our pumpkin to be dented.
R1: ch 2, 6 sc in 2nd ch from hook (6 sts) (you can use the magic circle if you prefer, as it won’t make a difference in the end. In that case, you will make a magic circle and make 6 sc in the magic circle. Watch this video to see how to start crocheting in the round using the “ch 2 method”.)
R2: *inc* rep 6 times (12 sts)
R3: *sc 1, inc* rep 6 times (18 sts)
R4: *sc 2, inc* rep 6 times (24 sts)
R5: *sc 3, inc* rep 6 times (30 sts)
R6: *sc 4, inc* rep 6 times (36 sts)
R7: *sc 5, inc* rep 6 times (42 sts)
R8-14: sc in all 42 sts (7 rounds total at 42 sts each)
R15: *sc 5, dec* rep 6 times (36 sts)
R16: *sc 4, dec* rep 6 times (30 sts)
R17: *sc 3, dec* rep 6 times (24 sts)
Adding the Face for the Orange Pumpkin
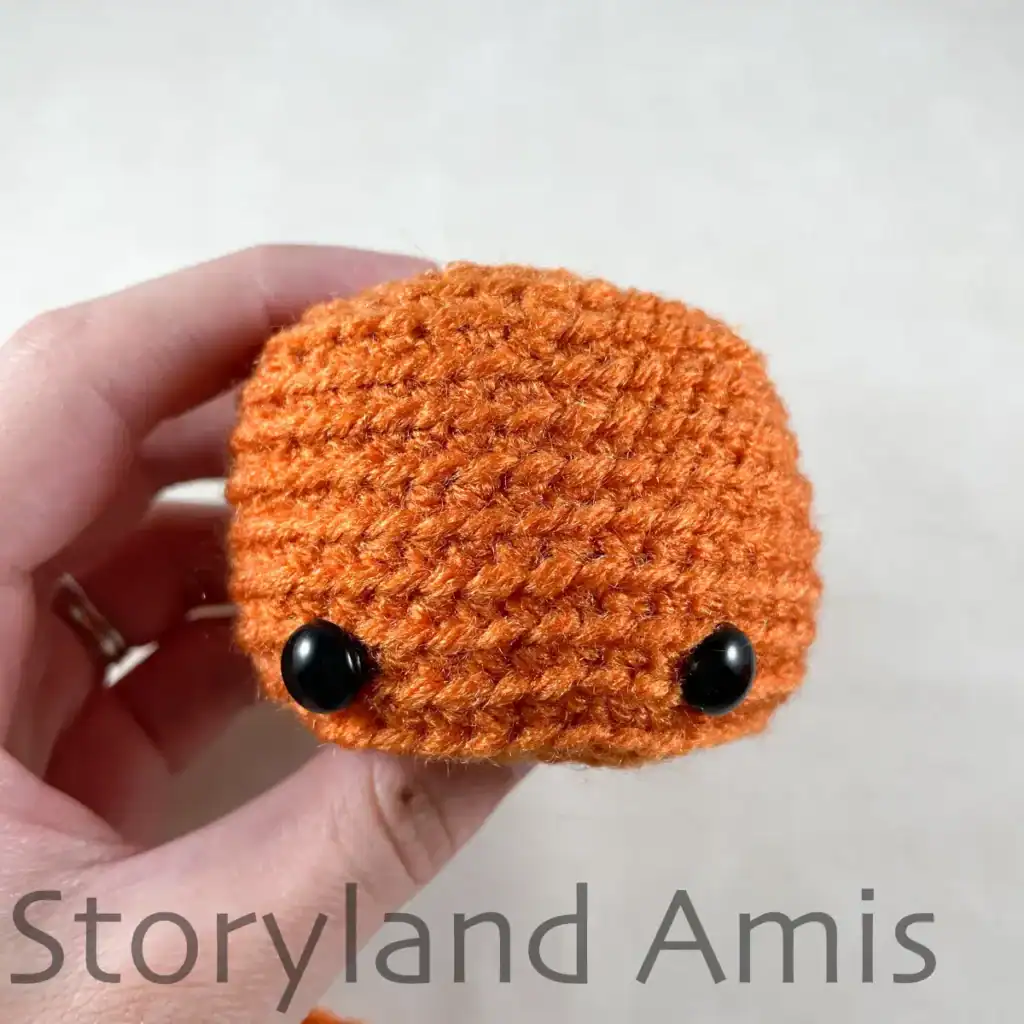
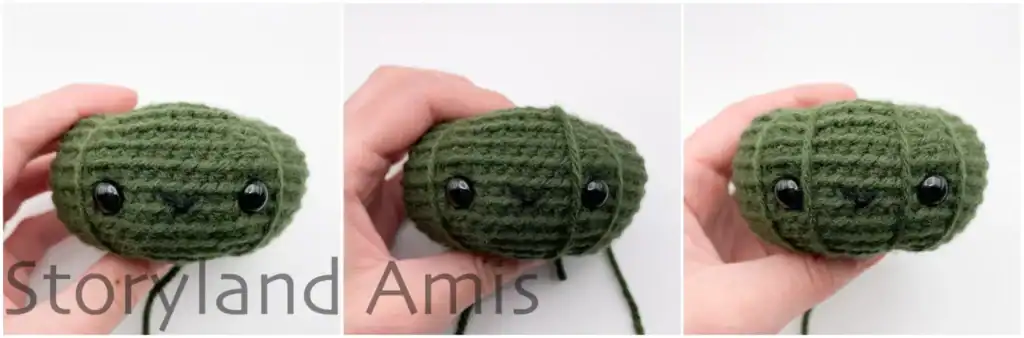
Insert your 9mm safety eyes between R7 and 8 spaced 8 stitches apart. (Hint: insert the 1st eye. Count 8 sts from the hole where you inserted the 1st eye and insert the 2nd eye. See pic. #5).
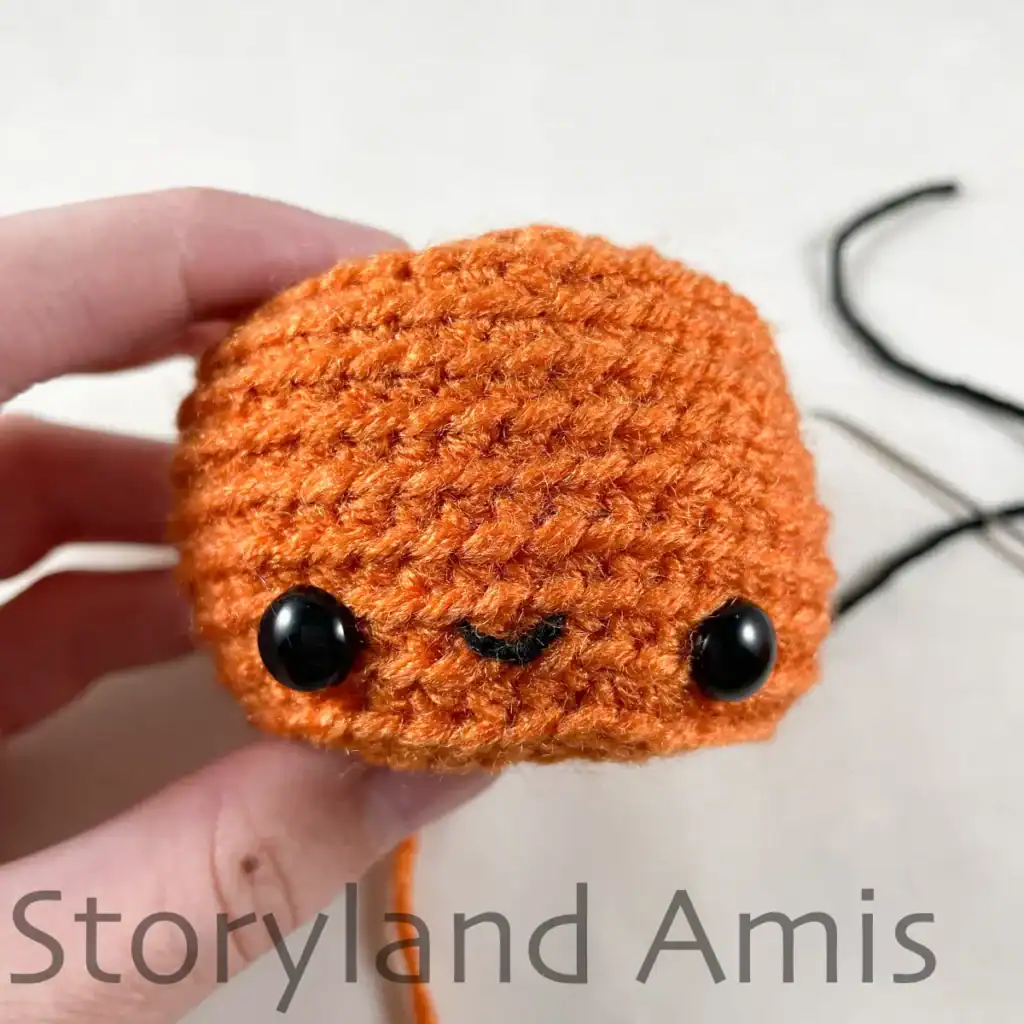
Using black embroidery floss, embroider a small smile right between his eyes about two crochet stitches wide and one stitch high (see pic. #6). Watch this video to learn how to embroider a simple smile.
Start to lightly stuff the pumpkin continuing to stuff as you work.
R18: *sc 2, dec* rep 6 times (18 sts)
R19: *sc 1, dec* rep 6 times (12 sts)
R20: *dec* rep 6 times (6 sts)
Finish off leaving a very long tail. We will use the tail to create the ridges on the pumpkin.
Making the Ridges
***Note: The ridges are created in the same way for all pumpkins.
Watch this video to learn how to create the ridges on our pumpkins.
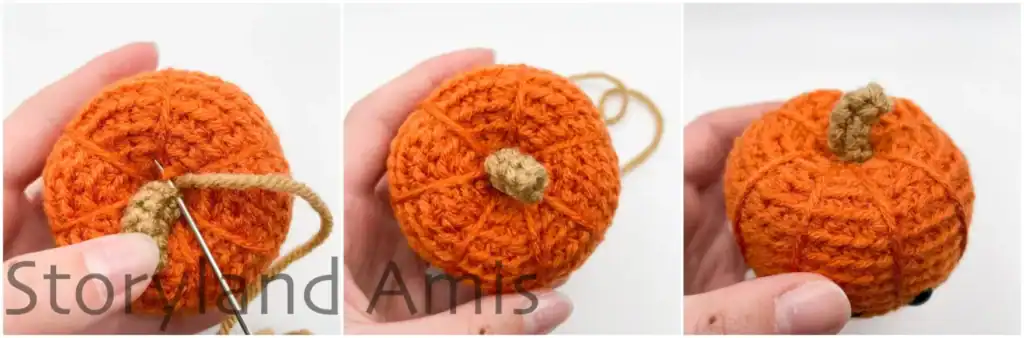
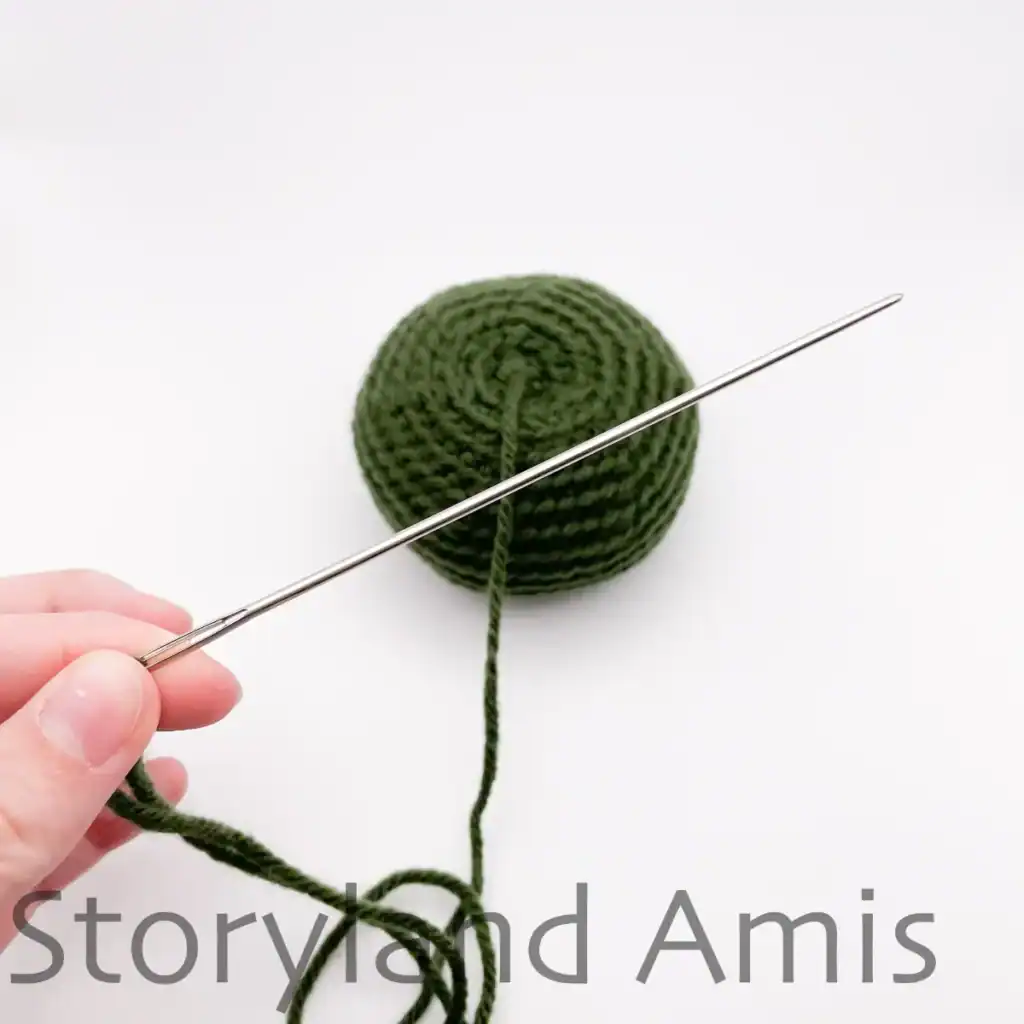
Thread your extra-long tapestry needle (pic. #7) with the long tail we left after finishing off.
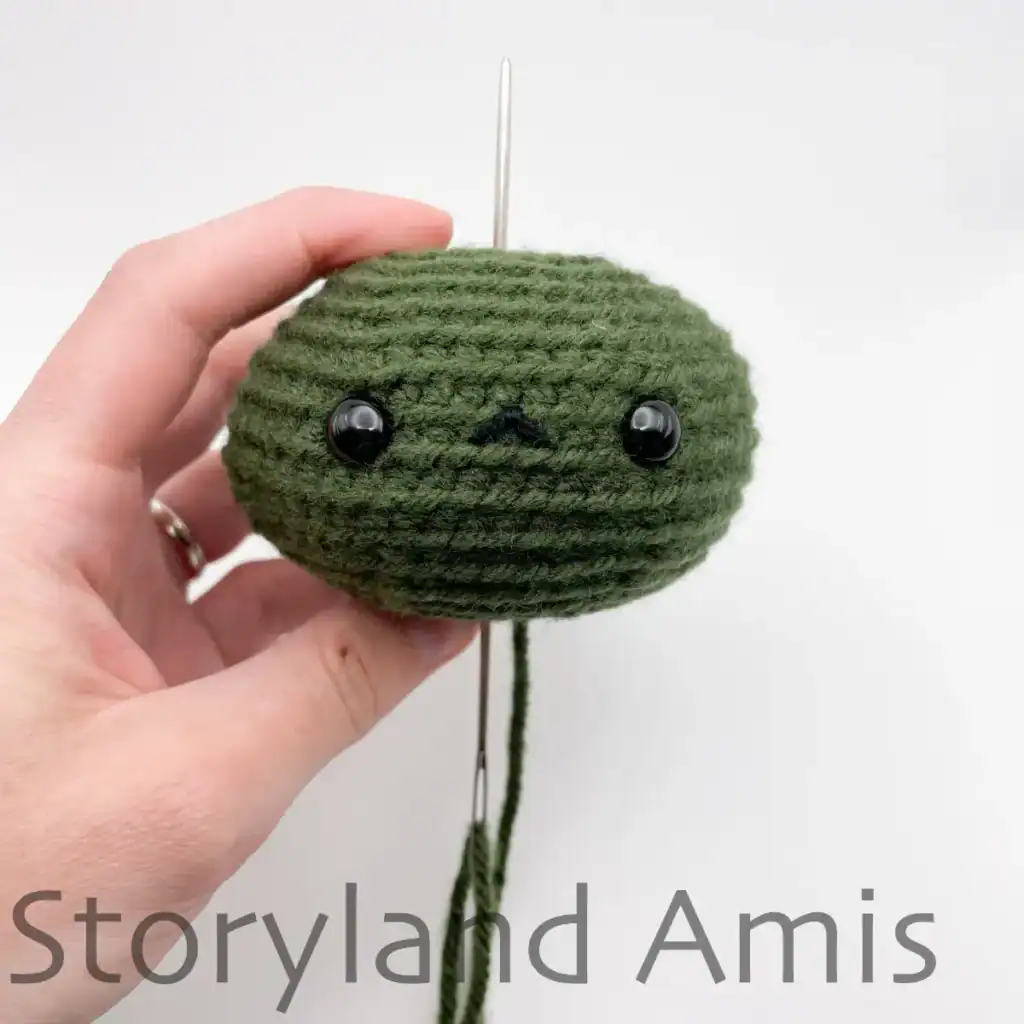
Starting at the center top hole of the pumpkin, draw your needle through to the bottom center of the pumpkin and pull (pic. #8).
Now pull the yarn up around the back of the pumpkin so there’s a line across the back and again insert your needle into the top of the pumpkin and draw the yarn down from the top hole to the bottom, pulling gently so that it’s slightly indented. Don’t pull too tightly because we don’t want the pumpkin to lose its shape. We want to pull it just tight enough so that it’s indented and makes nice humpy pumpkin ridges all around without completely flattening the pumpkin. Keep pulling the yarn through the top and bottom of the pumpkin, wrapping the yarn over the pumpkin to create the ridges (see pics. #9 & #10).
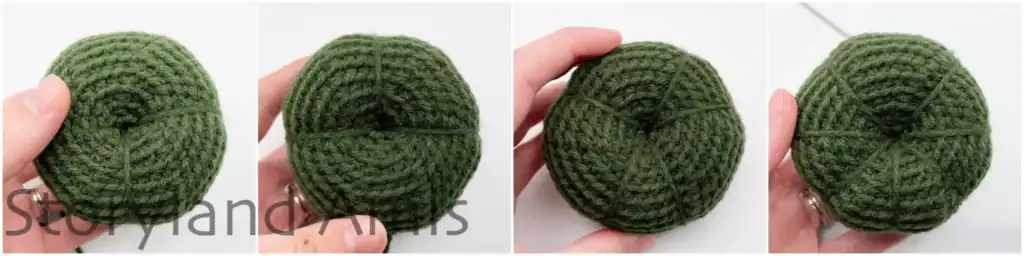
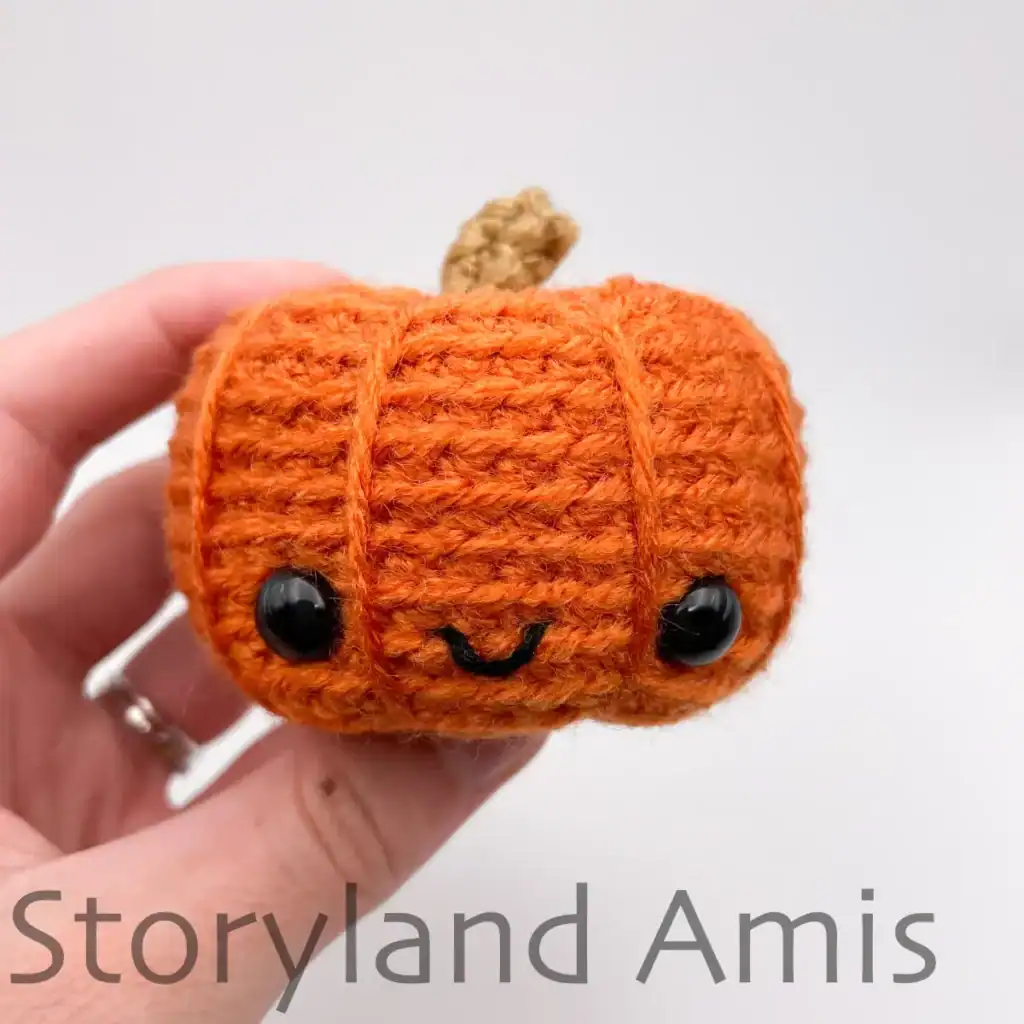
We will repeat this process until there are nine ridges total (see pic. #11). When you are finished, weave in the ends to secure and finish off (see pic. #12 for the finished orange pumpkin).
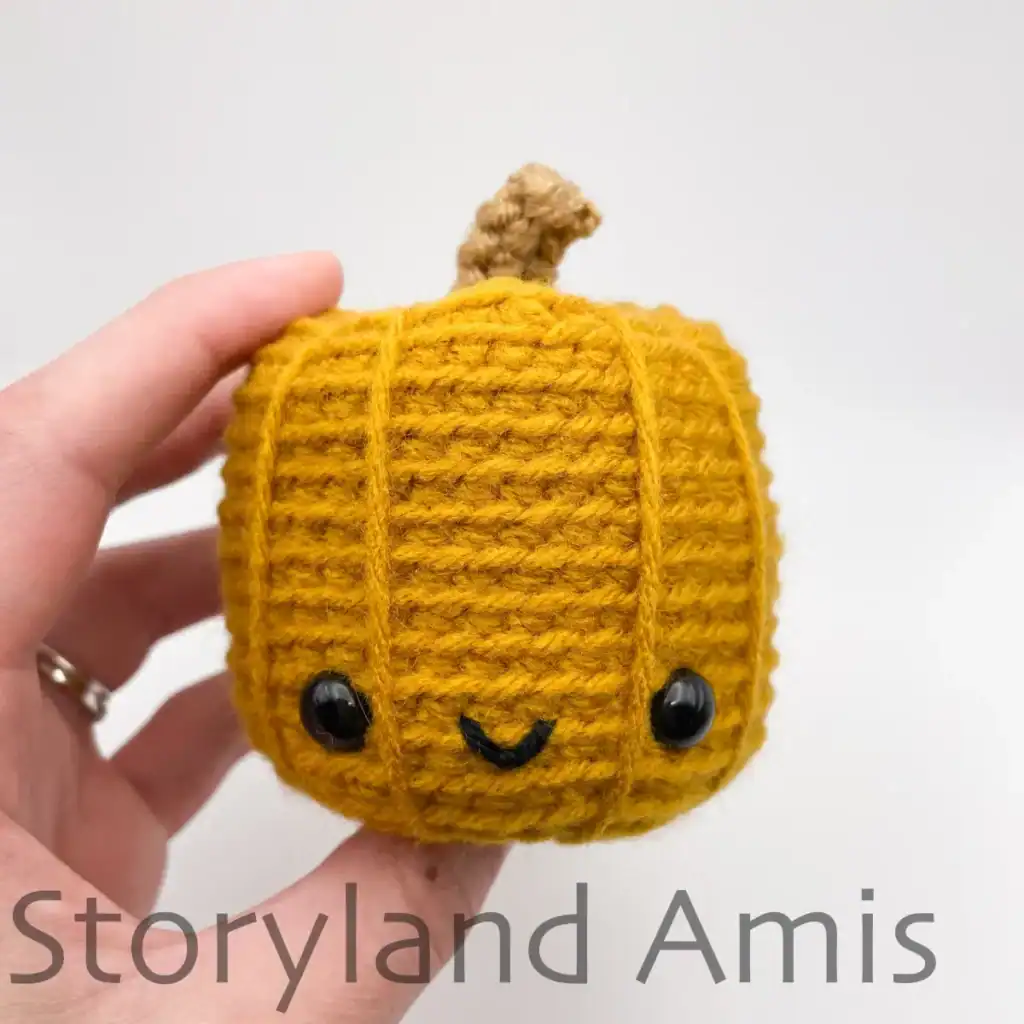
Yellow pumpkin (using golden yellow yarn)
(All rounds are worked in the back loops only)
Because we will be working in the BLO, our little pumpkin will naturally indent in the center. This is totally normal and works in our favor since we want both the bottom and top of our pumpkin to be dented.
R1: ch 2, 6 sc in 2nd ch from hook (6 sts) (you can use the magic circle if you prefer, as it won’t make a difference in the end. In that case, you will make a magic circle and make 6 sc in the magic circle. Watch this video to see how to start crocheting in the round using the “ch 2 method”.)
R2: *inc* rep 6 times (12 sts)
R3: *sc 1, inc* rep 6 times (18 sts)
R4: *sc 2, inc* rep 6 times (24 sts)
R5: *sc 3, inc* rep 6 times (30 sts)
R6: *sc 4, inc* rep 6 times (36 sts)
R7: *sc 5, inc* rep 6 times (42 sts)
R8-18: sc in all 42 sts (11 rounds total at 42 sts each)
R19: *sc 5, dec* rep 6 times (36 sts)
R20: *sc 4, dec* rep 6 times (30 sts)
R21: *sc 3, dec* rep 6 times (24 sts)
Adding the Face for the Yellow Pumpkin
Insert your 9mm safety eyes between R9 and R10, spaced 8 sts apart. (Hint: insert the 1st eye. Count 8 sts from the hole where you inserted the 1st eye and insert the 2nd eye.) See pic. #5. Using black embroidery floss, embroider a small smile right between his eyes, about two crochet stitches wide and one stitch high. (See pic. #6.) Watch this video to learn how to embroider a simple smile.
Start to lightly stuff the pumpkin continuing to stuff as you work.
R22: *sc 2, dec* rep 6 times (18 sts)
R23: *sc 1, dec* rep 6 times (12 sts)
R24: *dec* rep 6 times (6 sts)
Finish off, leaving a very long tail. We will use the tail to create the ridges on the pumpkin. (To see how to make the ridges, see the “Making the Ridges” section at the beginning of this post under the orange pumpkin pattern.) After completing the ridges, sew the stem to the top of your pumpkin (instructions for sewing the stem to the pumpkin are at the beginning of this post under the pattern for the stem.)
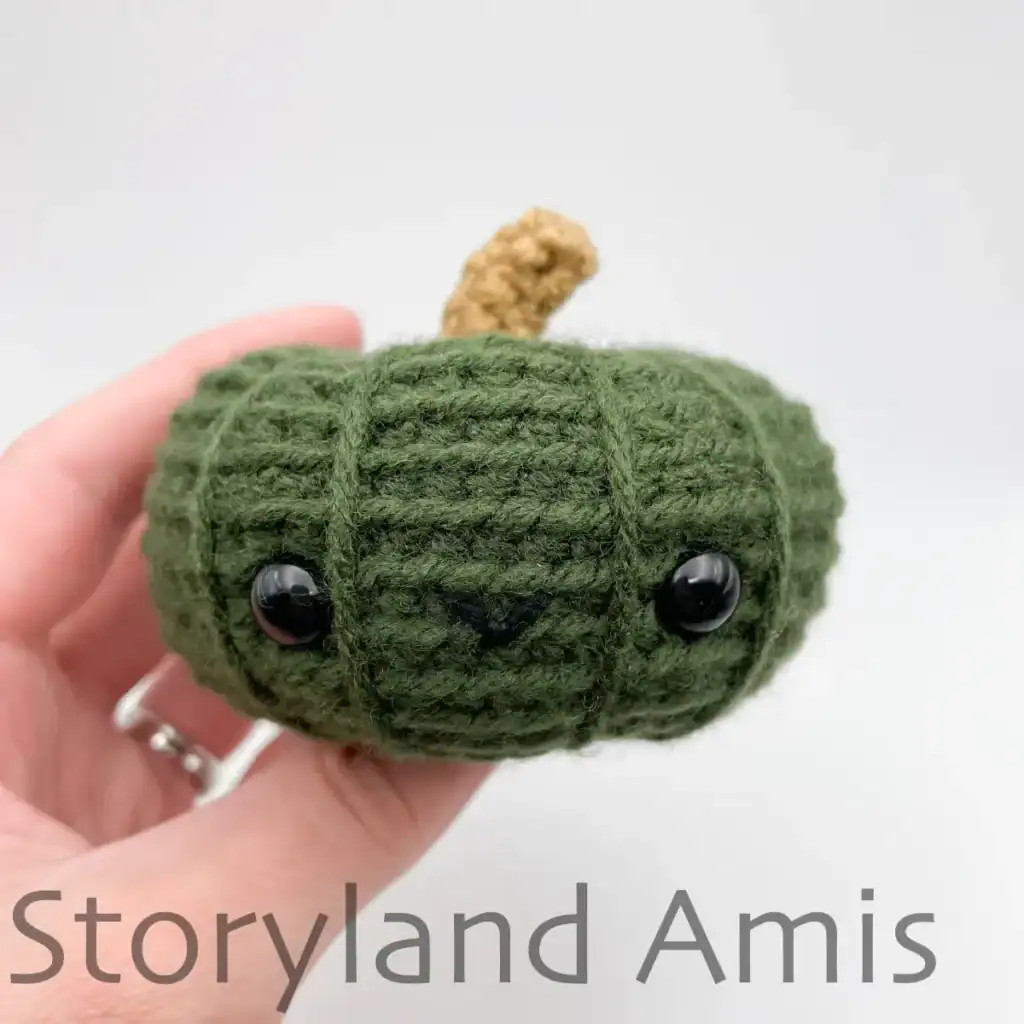
Green pumpkin (using dark green yarn)
(All rounds are worked in the back loops only)
Because we will be working in the BLO, our little pumpkin will naturally indent in the center. This is totally normal and works in our favor since we want both the bottom and top of our pumpkin to be dented.
R1: ch 2, 6 sc in 2nd ch from hook (6 sts) (you can use the magic circle if you prefer, as it won’t make a difference in the end. In that case, you will make a magic circle and make 6 sc in the magic circle. Watch this video to see how to start crocheting in the round using the “ch 2 method”.)
R2: *inc* rep 6 times (12 sts)
R3: *sc 1, inc* rep 6 times (18 sts)
R4: *sc 2, inc* rep 6 times (24 sts)
R5: *sc 3, inc* rep 6 times (30 sts)
R6: *sc 4, inc* rep 6 times (36 sts)
R7: *sc 5, inc* rep 6 times (42 sts)
R8: *sc 6, inc* rep 6 times (48 sts)
R9: *sc 7, inc* rep 6 times (54 sts)
R10-13: sc in all 54 sts (4 rounds total at 54 sts each)
R14: *sc 7, dec* rep 6 times (48 sts)
R15: *sc 6, dec* rep 6 times (42 sts)
R16: *sc 5, dec* rep 6 times (36 sts)
R17: *sc 4, dec* rep 6 times (30 sts)
R18: *sc 3, dec* rep 6 times (24 sts)
Adding the Face for the Green Pumpkin
Insert your 9mm safety eyes between R10 and 11, spaced 9 sts apart. (Hint: insert the 1st eye. Count 9 sts from the hole where you inserted the 1st eye and insert the 2nd eye. See pic. #5). Using black embroidery floss, embroider a small smile right between his eyes, about two crochet stitches wide and one stitch high (see pic. #6). Watch this video to learn how to embroider a simple smile.
Start to lightly stuff the pumpkin, continuing to stuff as you work.
R19: *sc 2, dec* rep 6 times (18 sts)
R20: *sc 1, dec* rep 6 times (12 sts)
R21: *dec* rep 6 times (6 sts)
Finish off, leaving a very long tail. We will use the tail to create the ridges on the pumpkin. (To see how to make the ridges, see the “Making the Ridges” section at the beginning of this post under the orange pumpkin pattern.) After completing the ridges, sew the stem to the top of your pumpkin (instructions for sewing the stem to the pumpkin are at the beginning of this post under the pattern for the stem.)
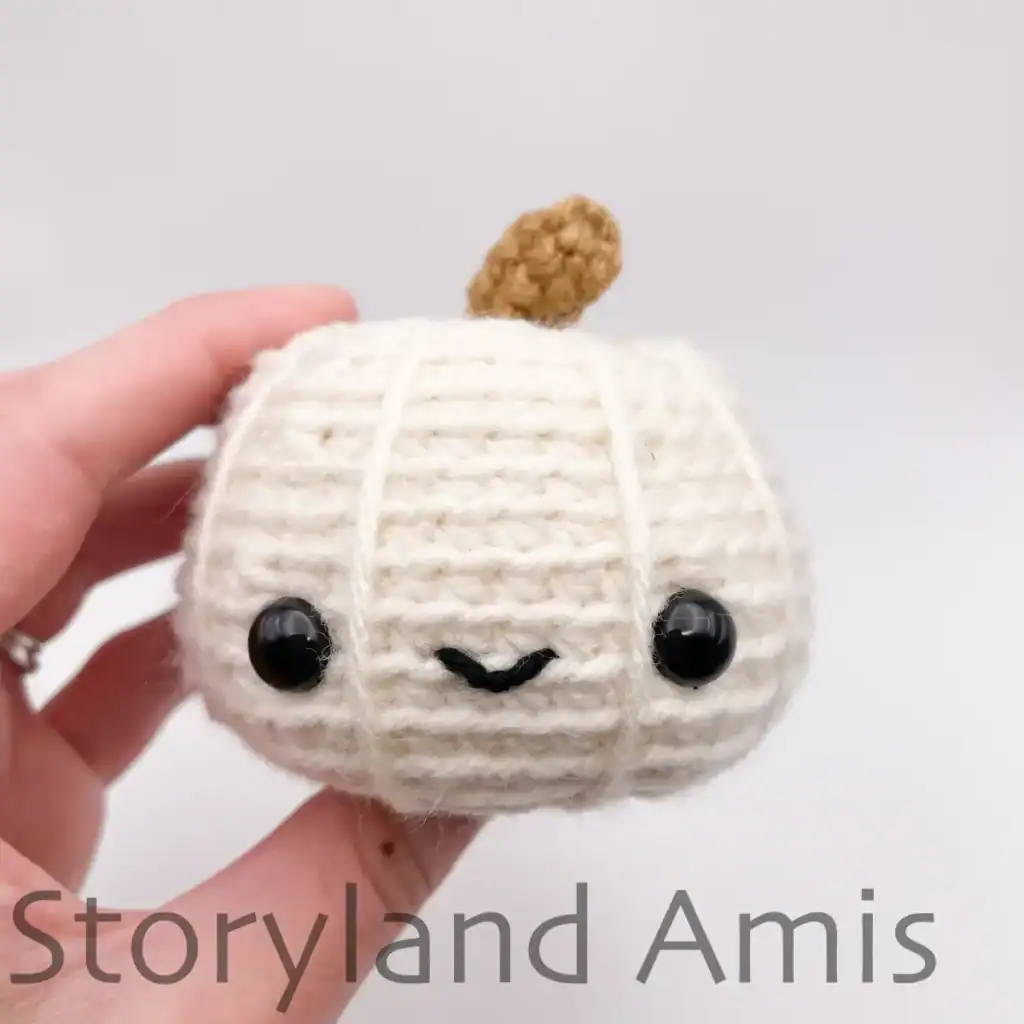
White pumpkin (Using cream yarn)
(All rounds are worked in the back loops only)
Because we will be working in the BLO, our little pumpkin will naturally indent in the center. This is totally normal and works in our favor since we want both the bottom and top of our pumpkin to be dented.
R1: ch 2, 6 sc in 2nd ch from hook (6 sts) (you can use the magic circle if you prefer, as it won’t make a difference in the end. In that case, you will make a magic circle and make 6 sc in the magic circle. Watch this video to see how to start crocheting in the round using the “ch 2 method”.)
R2: *inc* rep 6 times (12 sts)
R3: *sc 1, inc* rep 6 times (18 sts)
R4: *sc 2, inc* rep 6 times (24 sts)
R5: *sc 3, inc* rep 6 times (30 sts)
R6: *sc 4, inc* rep 6 times (36 sts)
R7: *sc 5, inc* rep 6 times (42 sts)
R8: *sc 6, inc* rep 6 times (48 sts)
R9-11: sc in all 48 sts (3 rounds total at 48 sts each)
R12: *sc 6, dec* rep 6 times (42 sts)
R13-14: sc in all 42 sts (2 rounds total at 42 sts each)
R15: *sc 5, dec* rep 6 times (36 sts)
R16-17: sc in all 36 sts (2 rounds total at 36 sts each)
R18: *sc 4, dec* rep 6 times (30 sts)
R19: *sc 3, dec* rep 6 times (24 sts)
Adding the Face for the White Pumpkin
Insert your 9mm safety eyes between R10 and 11, spaced 8 sts apart. (Hint: insert the 1st eye. Count 8 sts from the hole where you inserted the 1st eye and insert the 2nd eye. See pic. #5). Using embroidery black floss, embroider a small smile right between his eyes, about two crochet stitches wide and one stitch high. (See pic. #6.) Watch this video to learn how to embroider a simple smile.
Start to lightly stuff the pumpkin continuing to stuff as you work.
R20: *sc 2, dec* rep 6 times (18 sts)
R21: *sc 1, dec* rep 6 times (12 sts)
R22: *dec* rep 6 times (6 sts)
Finish off, leaving a very long tail. We will use the tail to create the ridges on the pumpkin. (To see how to make the ridges, see the “Making the Ridges” section at the beginning of this post under the orange pumpkin pattern.) After completing the ridges, sew the stem to the top of your pumpkin (instructions for sewing the stem to the pumpkin are at the beginning of this post under the pattern for the stem.)
Congratulations—you’re done! I hope you enjoyed making this free mini pumpkin amigurumi pattern. I would love to see pictures of your finished pumpkins!
If you make this free mini pumpkin amigurumi pattern, share your creations with me via social media or email me directly! You can find me on Instagram (@storyland_amis) and Facebook (Storyland Amis).
Thanks for stopping by! Please feel free to leave a comment below with any questions you may have. I always try to respond to each comment! Until next time, then – stay crafty!
More Free Fall and Halloween Amigurumi Patterns
Scout the Cuddle-Sized Ghost Amigurumi Pattern
Jack the Cuddle-Sized Pumpkin Amigurumi Pattern
muy bellos todos
Love the pattern, is the green pumpkin, the same as the orange pumpkin or is it a different pattern, not sure if I’m being silly but I can’t seem to find it.
Hi Emily! I’m so glad you’re enjoying this pattern! No, the green and orange pumpkins are not the same. You’ll find the green pumpkin pattern is after the yellow pumpkin and before the white pumpkin patterns. 🙂