Last Updated on September 7, 2026 by Holly Lanier
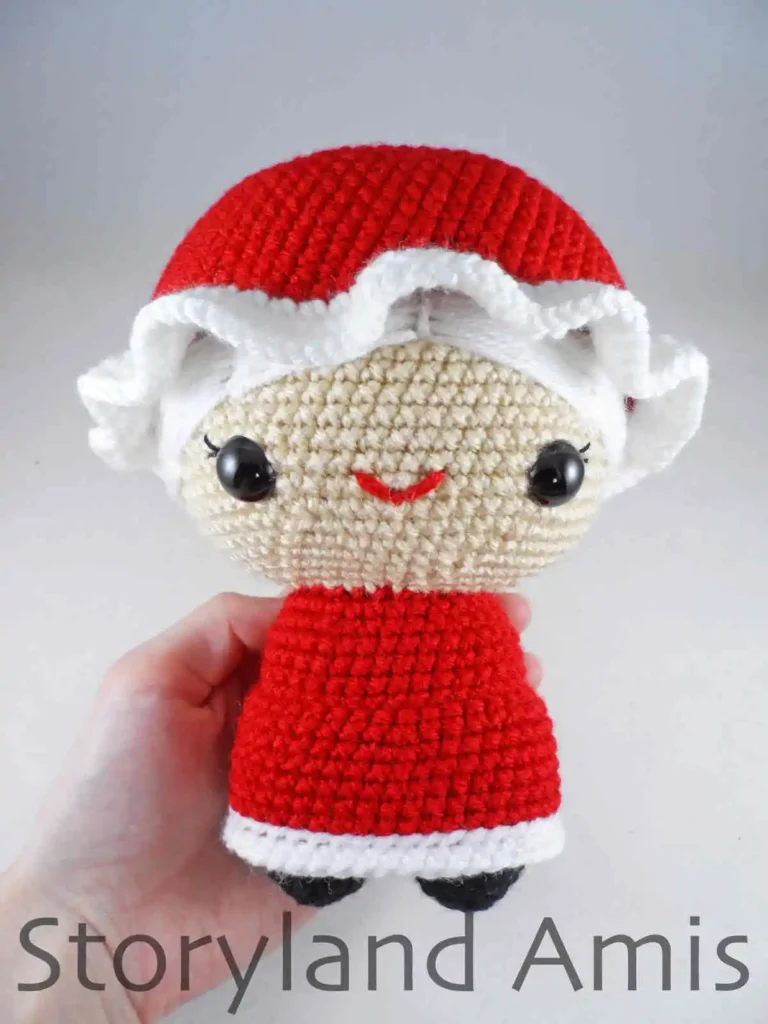
I’m so excited to finally be sharing this adorable companion to my Cuddle-Sized Santa Claus Amigurumi! I designed Mrs. Claus back in 2018 along with Santa Claus as part of my Christmas in July collection that year. This duo continues to be a favorite, and it’s not hard to see why! I hope you enjoy this FREE Mrs. Claus amigurumi pattern!
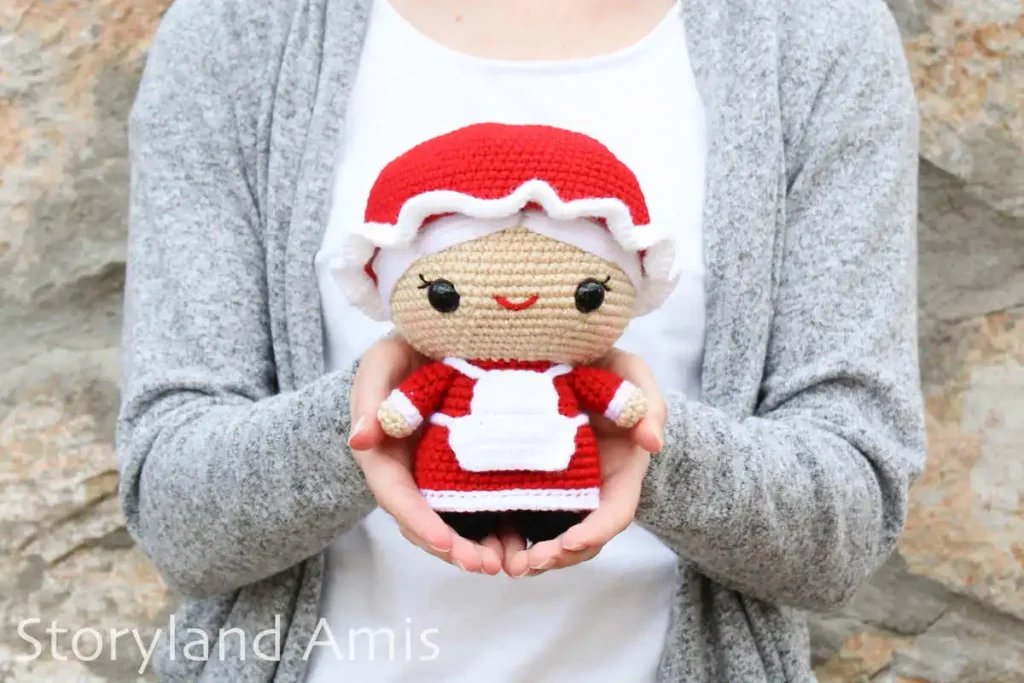
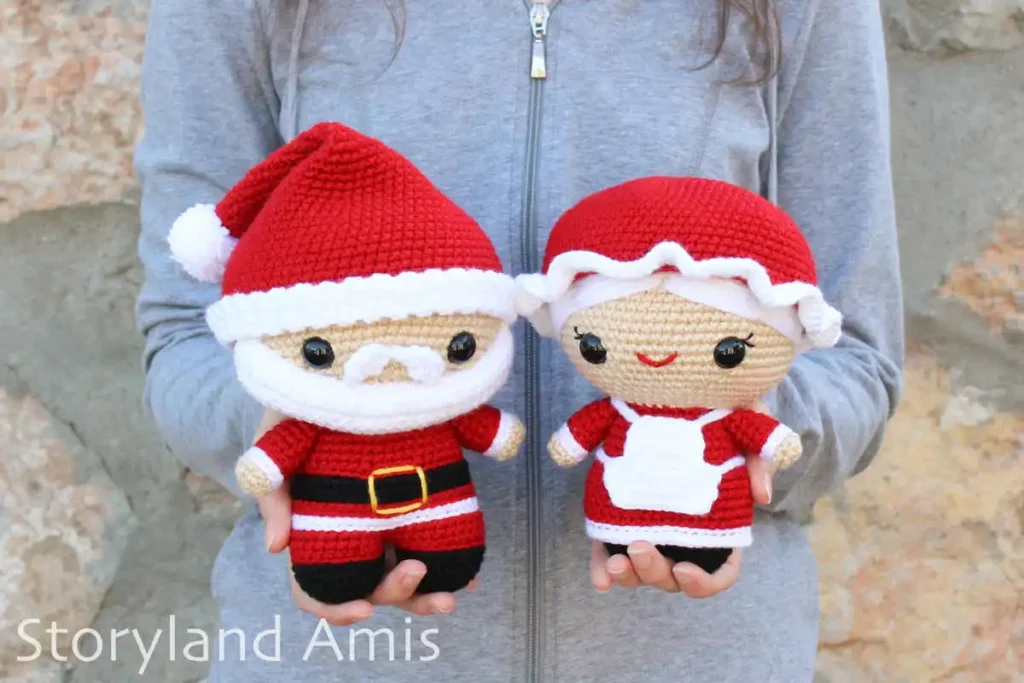
Meet Cuddle-Sized Mrs. Claus! She is sweet and gentle and the perfect companion for Santa Claus. She bakes the most amazing cookies, especially around Christmas time! Ask her nicely, and she might bake some for you too!
Do you want more FREE Christmas amigurumi patterns? Check out the free patterns for Sugar and Spice, the Cuddle-Sized Gingerbread Twins, and Mini Santa Claus Amigurumi!
You can purchase a printable, ad-free, beautifully formatted, concise version of this Mrs. Claus crochet pattern in my shop HERE. Otherwise, please keep scrolling down for the free version!
Disclaimer: Some links in this free Mrs. Claus amigurumi pattern may be affiliate links. Affiliate links are a way for me to make a small commission on certain products at no extra cost to you!
Materials You Need to Make This Free Mrs. Claus Amigurumi Pattern
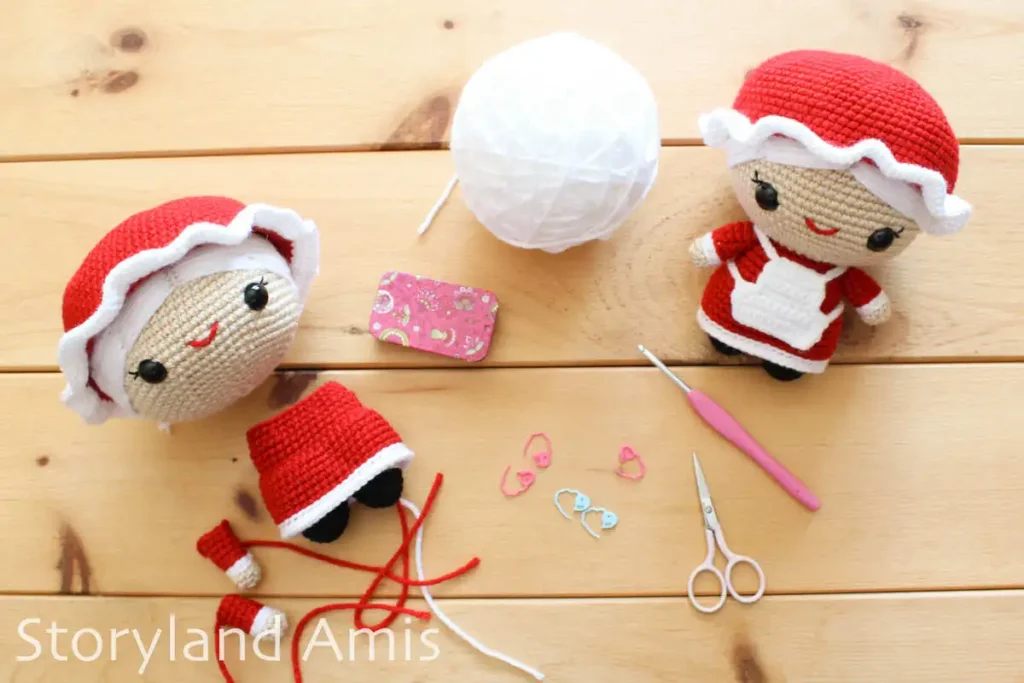
- Worsted-weight yarn (4-ply) in beige, red, white, and black. (The U.K. equivalent is Aran, and AUS/NZ is 10 ply.) For the beige skin, I used Lion Brand Vanna’s Choice in the color “Beige“. For everything else, I used Hobby Lobby’s I Love This Yarn in the following colors: “Red”, “White”, and “Black”.
- F (3.75 mm) crochet hook
- 15 mm black safety eyes
- Fiberfill (or your stuffing of choice)
- Bent tip tapestry needle
- Scissors
- Stitch marker
- Straight pins
Abbreviation Key
Abbreviations are in U.S. terms.
- sc – single crochet
- st/sts – stitch(es)
- sl st – slip stitch
- dec – decrease (join the next 2 stitches together)
- inc – increase (2 single crochet in the next stitch)
- BLO – back loops only
- R1 – round 1
- rep – repeat
- ** – repeat the group of instructions between the asterisks the number of times indicated.
Note: All rounds are worked continuously (that is, vs. joined rounds.)
The finished size is approximately 7 in. (18 cm.) tall. (Please be aware that your personal gauge, tension, hook size, and the brand of yarn you decide to use will all impact the finished size.)
The pattern and images in this post are the sole property of Storyland Amis. This written pattern is for personal use only. Please do not share, sell, or redistribute it in whole or in part.
You MAY sell the finished product, but please credit Storyland Amis as the designer. If you sell your finished items online, I would appreciate it if you could link them to my blog! You may not mass-produce items made from this pattern. Thank you for your understanding and respect.
Important Additional Info
Starting round: When starting my crochet pieces in the round, I always use the “ch 2 method.” That is perfectly fine if you prefer to start your pieces using the magic circle/ring instead. These two methods are interchangeable, and the end result will be the same regardless of your choice. Watch this short video to learn how to make the “ch 2 method”.
Right vs. wrong side: When working in the round, I always crochet with the “right” side of the stitches facing out. Watch my short video to see the difference between the “right” and “wrong” side of crochet stitches.
Yarn under vs. yarn over: I always yarn under (YU) instead of yarn over (YO) for all my amigurumi. Doing YO might make your amigurumi slightly larger than mine, so keep that in mind if you prefer YO. Watch my video on the differences between yarn under and yarn over.
Sewing pieces together: I sew all my pieces together using the whipstitch unless otherwise specified.
Stuffing: Check out my short video on how to stuff pieces properly here.
Color changes: Insert hook into last st of round or section with old color, yarn over & pull hook through st. Take your new color of yarn, yarn over & pull hook through remaining 2 loops on hook. Now you’re ready to start the new round or section. Check out my video on color changes here.
Get 24 patterns in this exclusive bundle!
For less than $15, you can get every Christmas pattern I’ve ever designed! Plus FREE access to any future Christmas designs for life.
Free Mrs. Claus Amigurumi Pattern
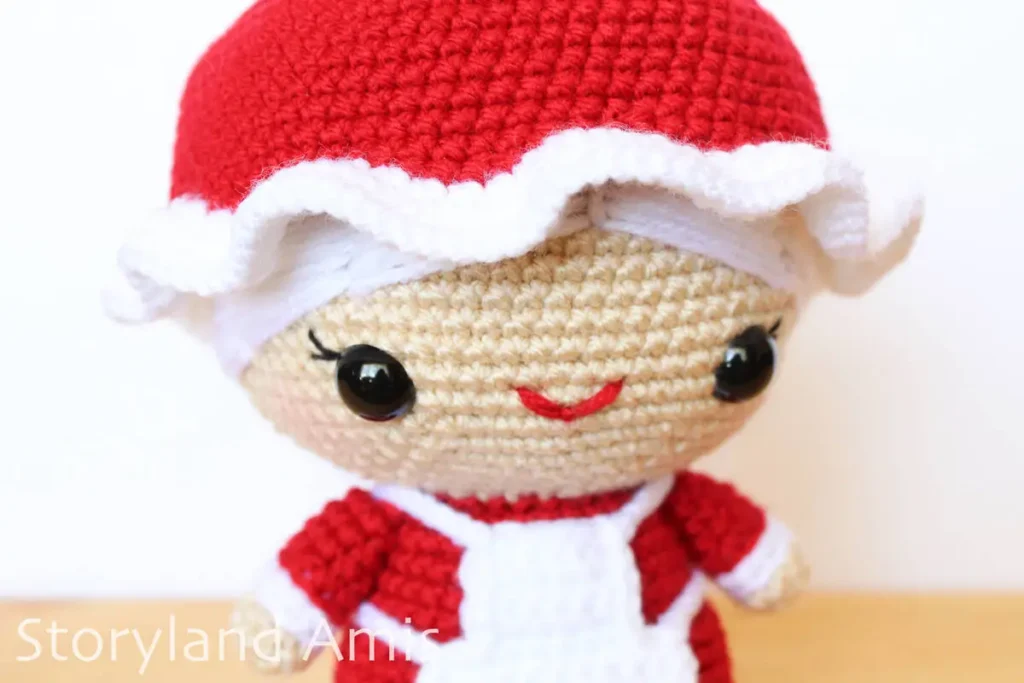
Head (Using Beige Yarn)
R1: ch 2, 6 sc in 2nd ch from hook (you can use the magic circle if you prefer, as it won’t make a difference in the end. In that case, you will make a magic circle and make 6 sc in the magic circle. Watch this video to see how to start crocheting in the round using the “ch 2 method”.)
R2: *inc 1* rep 6 times (12 sts)
R3: *sc 1, inc 1* rep 6 times (18 sts)
R4: *sc 2, inc 1* rep 6 times (24 sts)
R5: *sc 3, inc 1* rep 6 times (30 sts)
R6: *sc 4, inc 1* rep 6 times (36 sts)
R7: *sc 5, inc 1* rep 6 times (42 sts)
R8: *sc 6, inc 1* rep 6 times (48 sts)
R9: *sc 7, inc 1* rep 6 times (54 sts)
R10: *sc 8, inc 1* rep 6 times (60 sts)
R11: *sc 9, inc 1* rep 6 times (66 sts)
R12: *sc 10, inc 1* rep 6 times (72 sts)
R13-25: sc in all 72 sts (13 rounds total at 72 sts each)
R26: *sc 10, dec 1* rep 6 times (66 sts)
R27: *sc 9, dec 1* rep 6 times (60 sts)
R28: *sc 8, dec 1* rep 6 times (54 sts)
R29: *sc 7, dec 1* rep 6 times (48 sts)
R30: *sc 6, dec 1* rep 6 times (42 sts)
Adding the Face
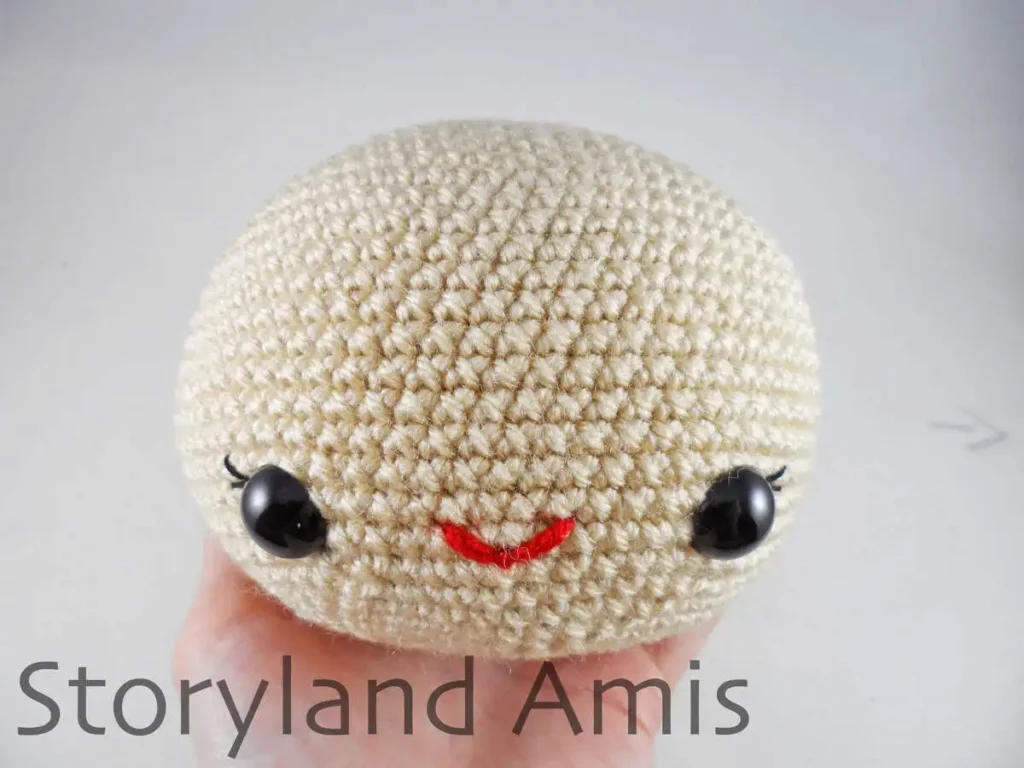
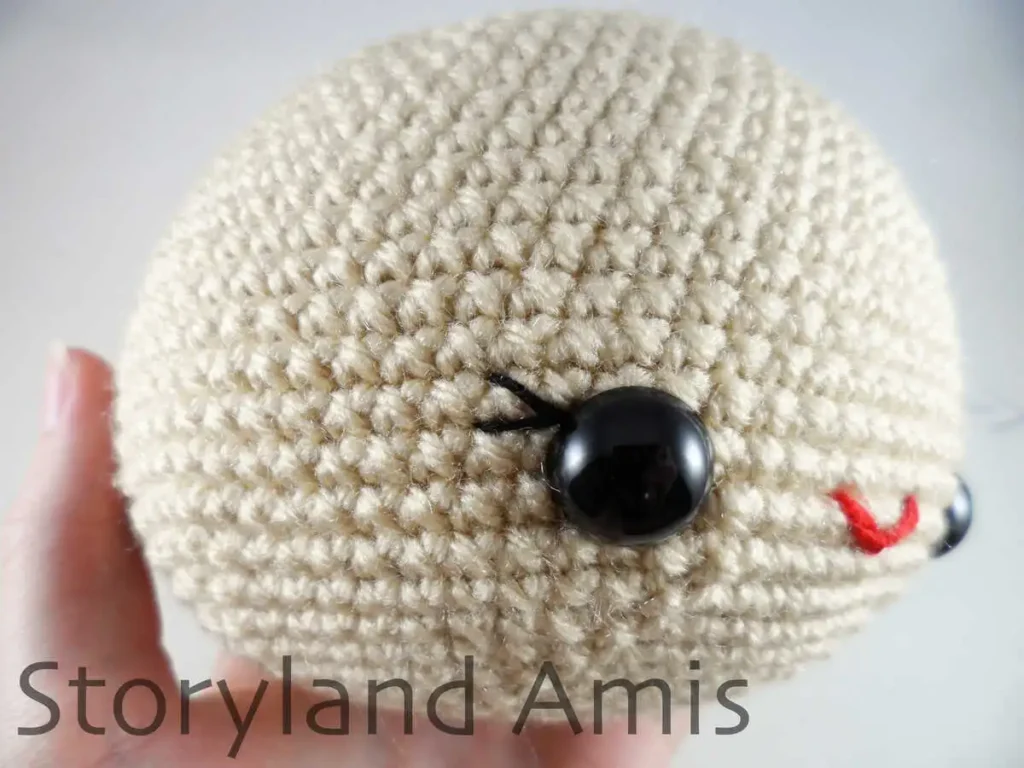
Insert the eyes between R24 & 25, 14 sts apart. (Hint: insert the 1st eye. Count 14 sts from the hole where you inserted the 1st eye and insert the 2nd eye. See pic. #1.) Embroider her eyelashes using black embroidery floss before you secure the eyes (see pic. #2). Now embroider her smile using red yarn. Watch this video to see how to embroider a simple smile. I embroidered mine centered between the eyes, about 4 crochet stitches wide (see pic. #1).
R31: *sc 5, dec* rep 6 times (36 sts)
R32: *sc 4, dec* rep 6 times (30 sts)
Stop and start to stuff the head, continuing to stuff as you work.
R33: *sc 3, dec* rep 6 times (24 sts)
R34: *sc 2, dec* rep 6 times (18 sts)
R35: *sc 1, dec* rep 6 times (12 sts)
R36: *dec * rep 6 times (6 sts)
Finish off. Finish stuffing head firmly, and use the tail to sew up hole, then weave in your end.
Cap (Starting in Red Yarn)
R1: ch 2, 6 sc in 2nd ch from hook (6 sts)
R2: *inc 1* rep 6 times (12 sts)
R3: *sc 1, inc 1* rep 6 times (18 sts)
R4: *sc 2, inc 1* rep 6 times (24 sts)
R5: *sc 3, inc 1* rep 6 times (30 sts)
R6: *sc 4, inc 1* rep 6 times (36 sts)
R7: *sc 5, inc 1* rep 6 times (42 sts)
R8: *sc 6, inc 1* rep 6 times (48 sts)
R9: *sc 7, inc 1* rep 6 times (54 sts)
R10: *sc 8, inc 1* rep 6 times (60 sts)
R11: *sc 9, inc 1* rep 6 times (66 sts)
R12: *sc 10, inc 1* rep 6 times (72 sts)
R13: *sc 11, inc* rep 6 times (78 sts)
R14-22: sc in all 78 sts (9 rounds total at 78 sts each)
R23: *sc 11, dec* rep 6 times (72 sts)
Switch to white yarn
R24: *inc* rep 72 times (144 sts)
R25-26: sc in all 144 sts (2 rounds total at 144 sts each)
Finish off and leave a long tail for sewing. Set the hat aside until we embroider the hair.
Hair (Using White Yarn)
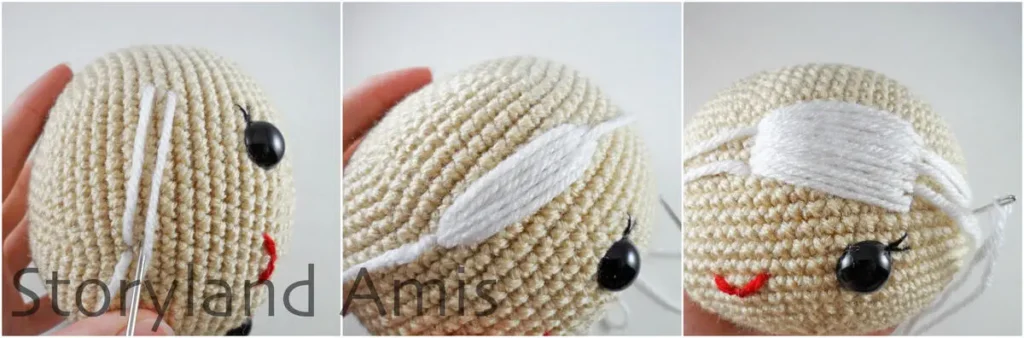
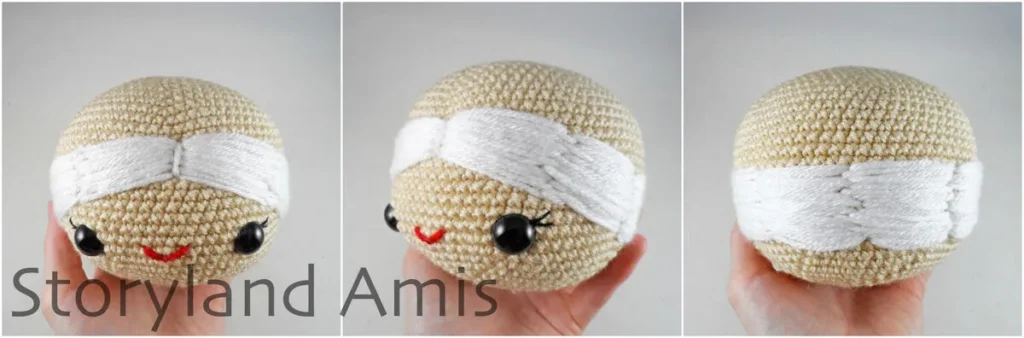
Take a long strand of white yarn and, starting between R15 & 16 of the head, start to embroider the hair. We will embroider the hair in sections all the way around the head. We only need to embroider high enough up so that when her hat is on, the beige head is not showing. So, make sure to place the cap on her head as you embroider to be sure you are adding enough hair. Embroider the hair so that the white yarn is thick enough so that the head doesn’t show through. You can use pic. #3 as a guide to see how I did mine, but you can really just embroider it to your liking.
Note: You will need to use more than one strand of white yarn to complete the hair. When you are almost finished with one strand, weave the tail through to the top of the head and leave it there until you run out of the next strand. Then weave that tail up to the first strand and knot the two tails together. This will help secure your embroidery. Then weave the remaining tails into the head. You can do this as many times as you need to, depending on how many strands of yarn you end up using.
Sewing the Cap to the Head
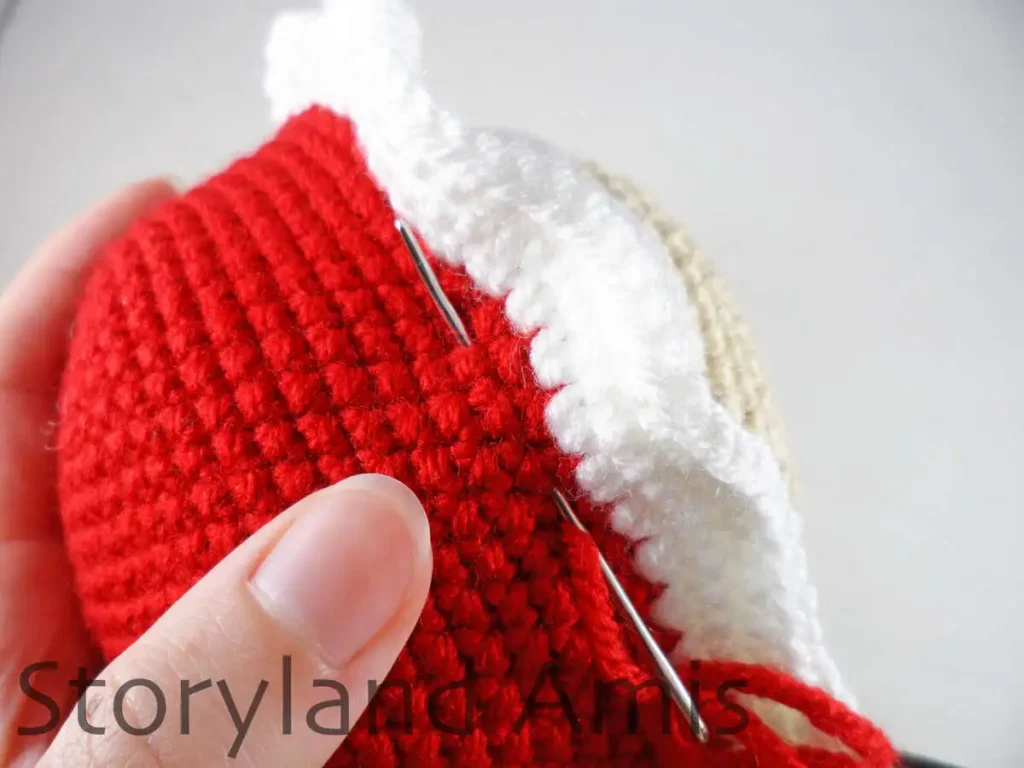
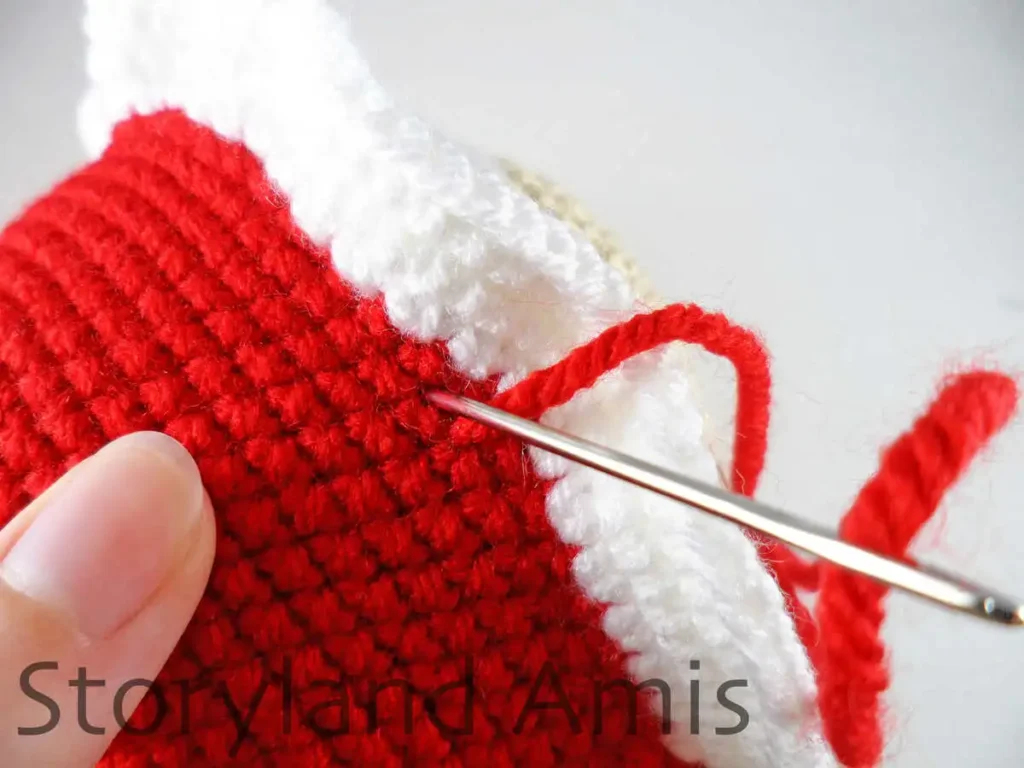
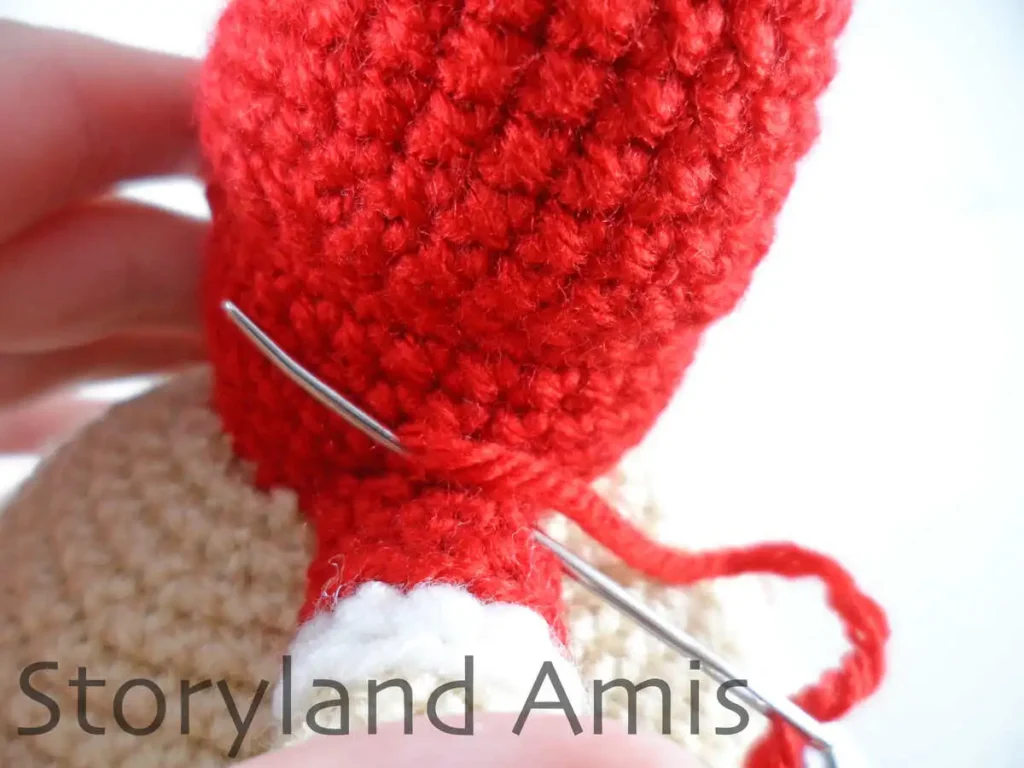
Now position the cap on her head and pin it down with straight pins to keep it in place. Then take a long strand of red yarn and thread your tapestry needle. Step one: Grab a stitch on the head, then pull your needle up through the hat, then go under several stitches on the hat (see pic. #4). Step two: Now, go over one stitch on the hat and pull your needle through that stitch, also grabbing a stitch from the head as you go(see pic. #5). Repeat steps one and two until the hat is sewn on. When finished, make a knot to secure the sewing and weave the remaining tail into the head. Weave in all ends.
Legs (Make 2 Starting in Black Yarn)
R1: ch 2, 6 sc in 2nd ch from hook (6 sts)
R2: *inc* rep 6 times (12 sts)
R3: sc in all 12 sts (12 sts)
R4: *sc 1, inc* rep 6 times (18 sts)
R5: sc in all 18 sts (18 sts)
Switch to white yarn
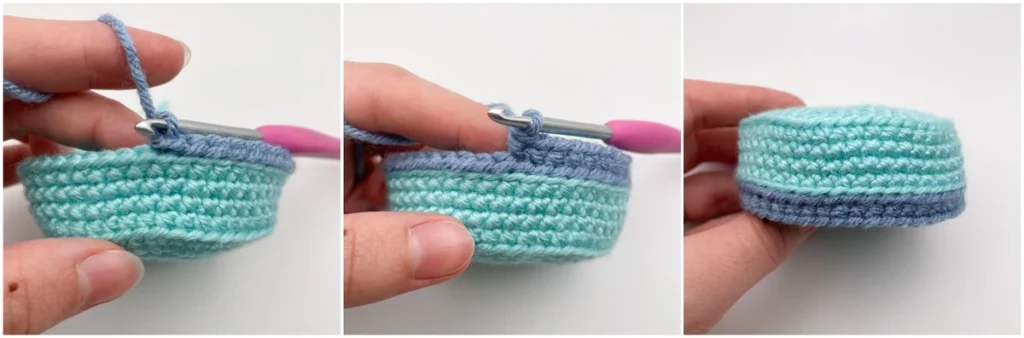
Watch this video here to learn how to make the clean edge color change used on R6a and R6 (see pic. #6).
R6a: in BLO very loosely slip stitch in all 18 sts (18 sts)
R6: in BLO sc in all 18 sts (18 sts) (this is the only round we will crochet in the back loops until R14)
R7: sc in all 18 sts (18 sts)
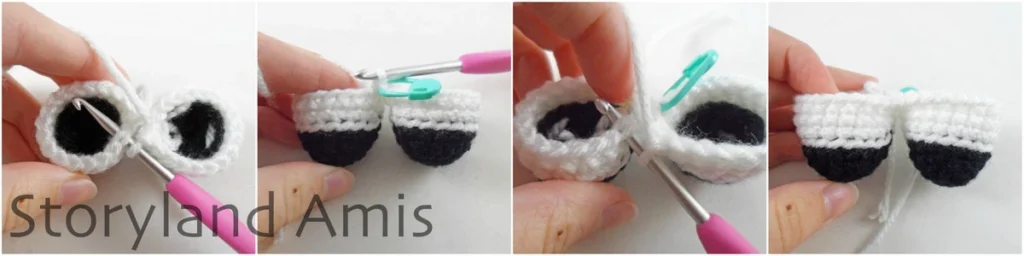
Finish off on the 1st leg. Do NOT finish off or cut the yarn on the 2nd leg.
We will now join the legs together and start making the body. The left leg is the one we finished off on, the right leg is the one still attached to the yarn that we did not finish off. (From the doll’s perspective.)
Body (Continuing in White Yarn)
R8: join the right leg to the left leg with a sc in the 1st st of the left leg, sc 17 more on the left leg; now finish joining the legs together by making a sc in the next st on the right leg, then sc 17 more (36 sts). See pic. #7
R9-12: sc in all 36 sts (4 rounds total at 36 sts each)
Switch to red yarn (we won’t do the “clean edge color change” on this round since it will be hidden by her skirt later).
R13: sc in all 36 sts (36 sts)
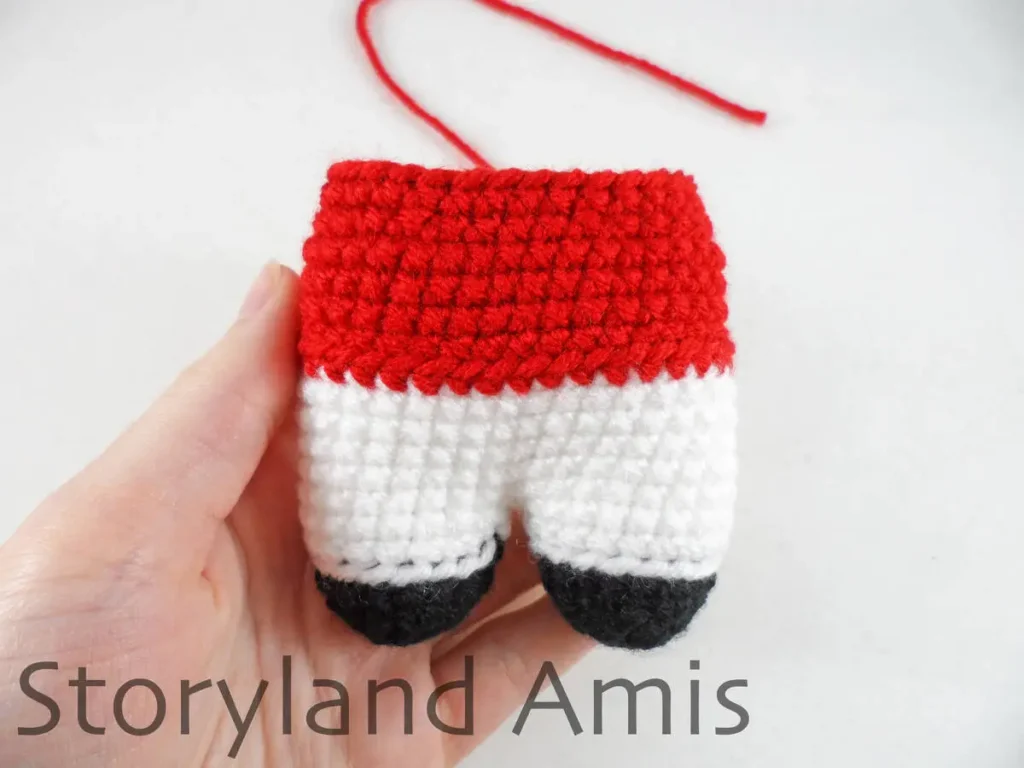
R14: in BLO sc in all 36 sts (36 sts ) (We will use the front loops later on to create her skirt. This is the last round we’ll crochet in the BLO on the body.)
R15-17: sc in all 36 sts (3 rounds total at 36 sts each)
R18: *sc 4, dec* rep 6 times (30 sts)
R19: sc in all 30 sts (30 sts)
Finish off and leave a long tail for sewing (see pic. #8).
Skirt (Starting in Red Yarn)
Hold the body upside down and, starting at the back of the body, join your red yarn to the first front loop of R14 of the body by making a slip stitch (see pic. #9).
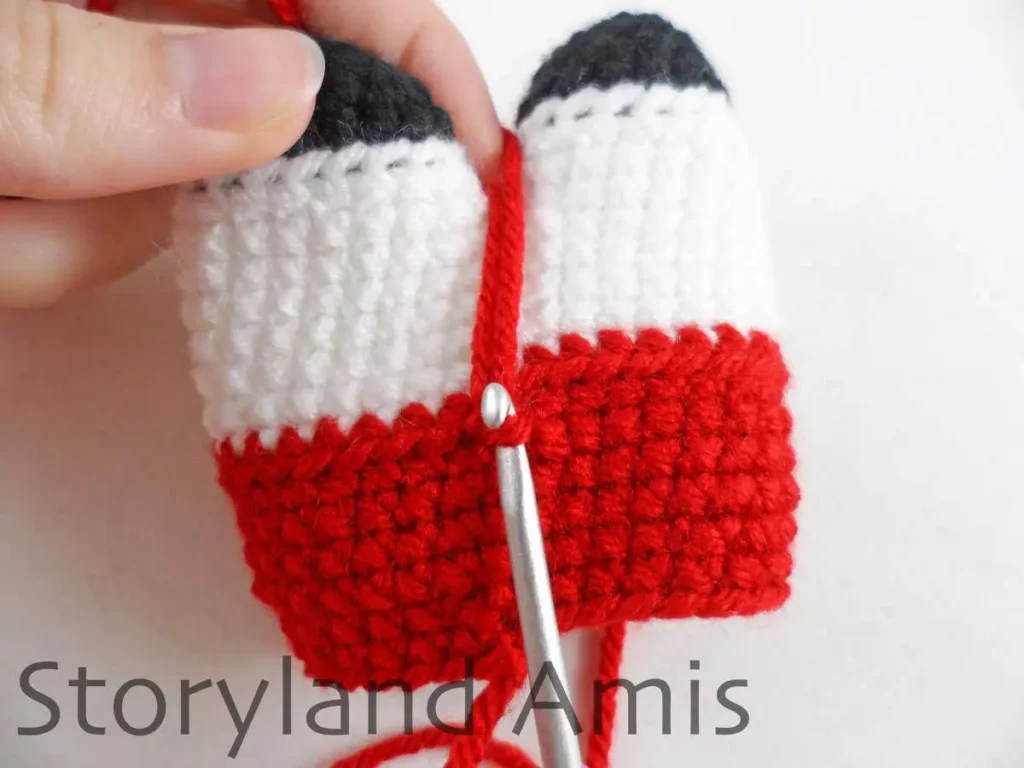
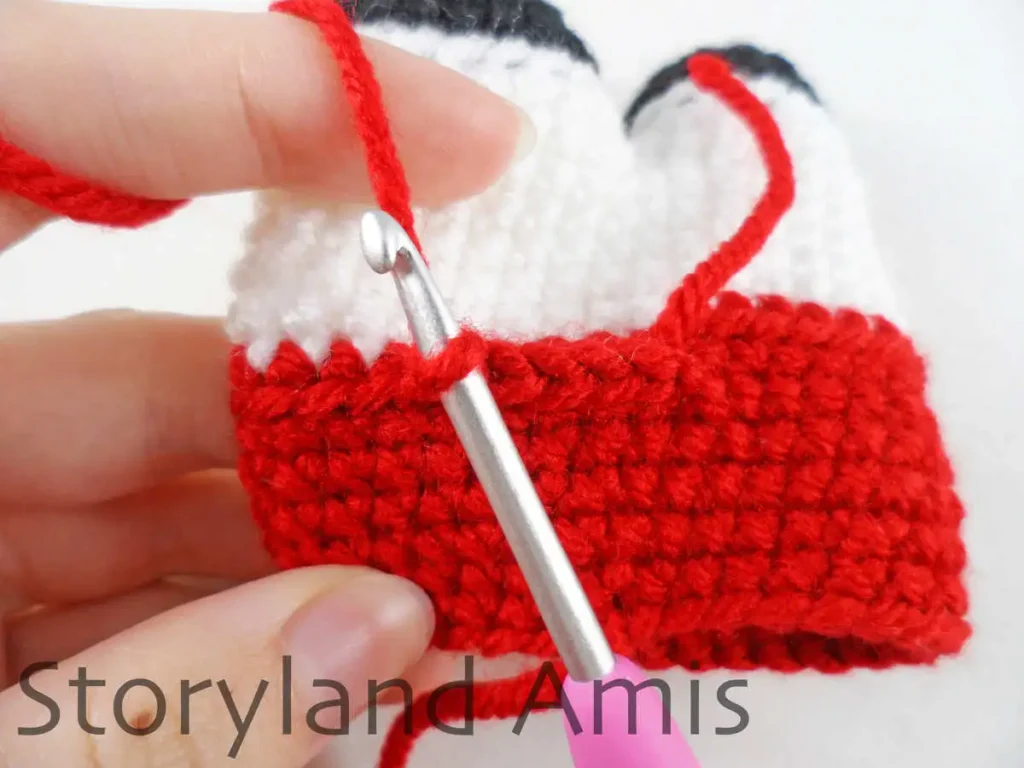
R1: sc in all 36 front loops from R14 (36 sts) (see pic. #10)
R2: *sc 5, inc* rep 6 times (42 sts)
R3-7: sc in all 42 sts (5 rounds total at 42 sts each)
Switch to white yarn
Watch this video here to learn how to make the clean edge color change used on R8a and R8 (see pic. #6).
R8a: in BLO very loosely slip stitch in all 42 sts (42 sts)
R8: in BLO sc in all 42 sts (42 sts)
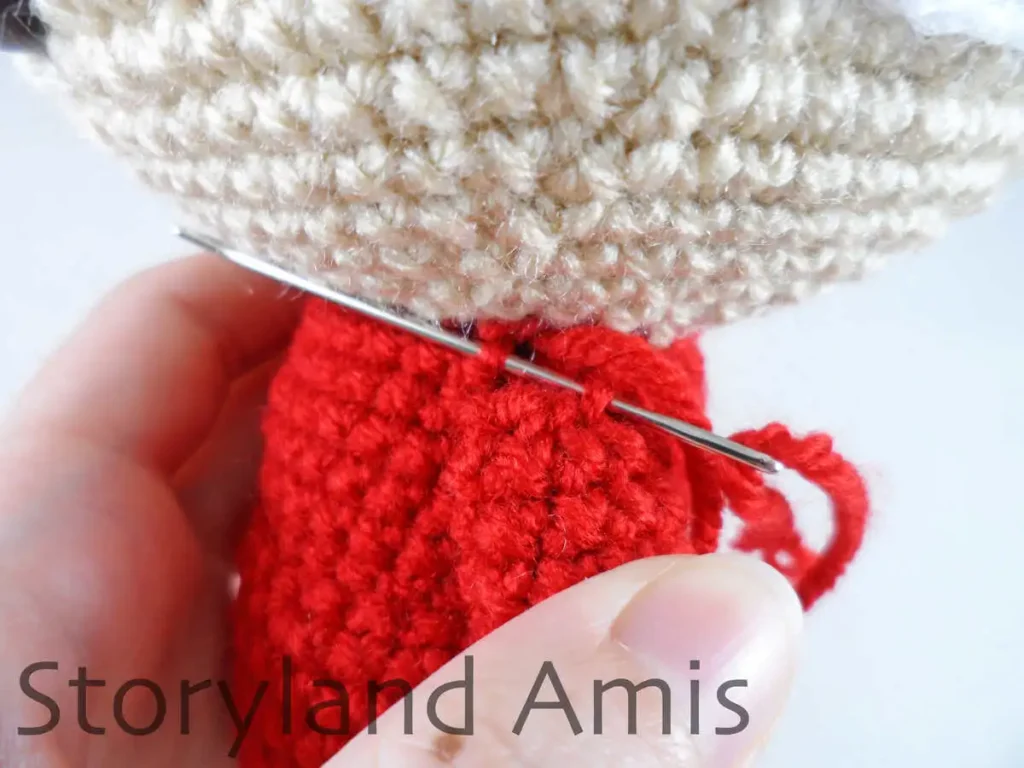
Finish off and weave the loose ends from the skirt into the inside of the body. Stuff the body firmly, then position it under the bottom of the head so that the legs are lined up evenly with the eyes. Pin the body to the head so that it stays in place while you sew it on. Sew the body to the head using the seamless join method. You might want to add a little more stuffing to her neck just before you finish sewing it closed. When you are finished, make a knot to secure the sewing and weave the remaining tail into the body to finish (see pic. #11).
Arms (Starting in Beige Yarn)
R1: ch 2, 6 sc in 2nd ch from hook (6 sts)
R2: *sc 1, inc* rep 3 times (9 sts)
R3: sc in all 9 sts (9 sts)
Switch to white yarn
Watch this video here to learn how to make the clean edge color change used on R4a through R5 (see pic. #6).
R4a: in BLO very loosely sl st in all 9 sts (9 sts)
R4: in BLO sc in all 9 sts (9 sts) this is the only round we will crochet in the back loops until R5
Switch to red yarn
R5a: in BLO very loosely sl st in all 9 sts (9 sts)
R5: in BLO sc in all 9 sts (9 sts) this is the last round we will crochet in the back loops only on the arms
R6-8: sc in all 9 sts (3 rounds total at 9 sts each)
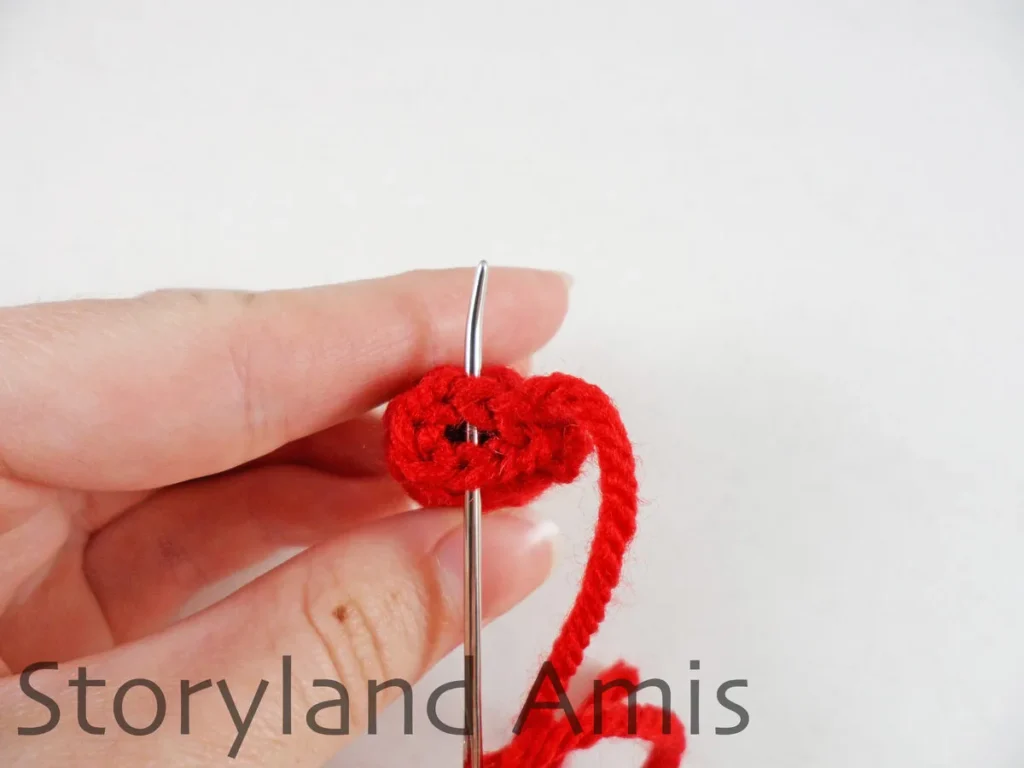
Finish off and leave a long tail for sewing. Lightly stuff the arms. Flatten the top of each arm, and sew the open end closed using the whipstitch to create a flat edge for sewing (see pic. #12). Watch this video to learn how to sew the open ends closed to create a flat edge.
Get 24 patterns in this exclusive bundle!
For less than $15, you can get every Christmas pattern I’ve ever designed! Plus FREE access to any future Christmas designs for life.
Sewing the Arms to the Body
Position the arms to either side of the body and sew them to the last round of the body using the whipstitch (see pic. #13). Once you are finished, make a knot to secure the sewing and weave the remaining tails into the body to finish.
**NOTE: When I finished sewing my arms on, I didn’t like how the arms were sticking straight out at the sides, so I wove my yarn tail down to the middle underside of each arm and sewed a few stitches of the arm to the side of the body (see pic. #14).
Apron (Using White Yarn)
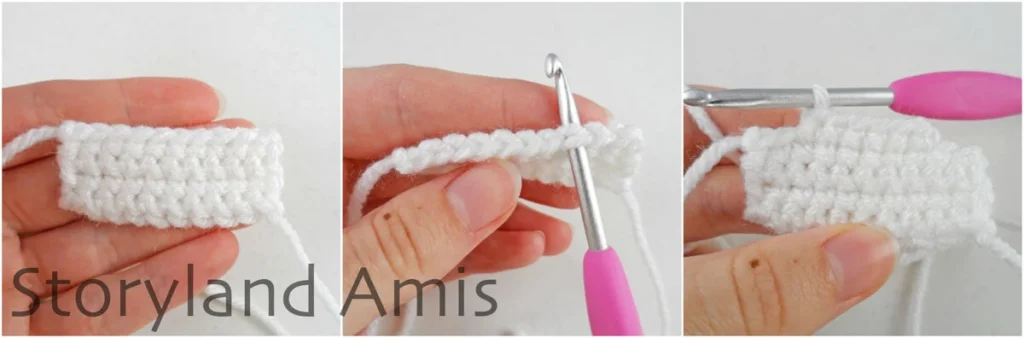
The apron is worked in rows instead of rounds, so you will ch 1 and turn at the end of each row. The apron is made in two parts.
Part One
R1: ch 11, starting in the 2nd ch from the hook, sc 10, ch 1, turn
R2-4: sc in all 10 sts (10 sts) ch 1, turn (3 rows total at 10 sts each)
Finish off. There’s no need to leave a long tail. Weave all ends in neatly (see the first image in pic. #15).
Part Two
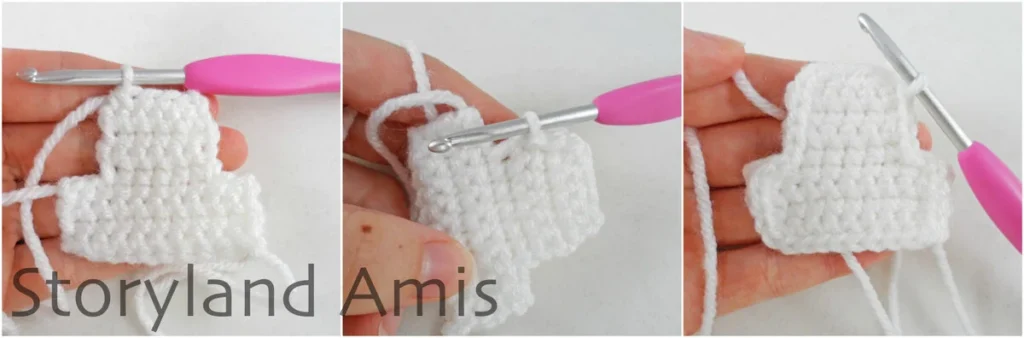
Now join your white yarn to the 3rd st of R4 from the first piece (see the second image in pic. #15)
R5: sc 6 (6 sts), ch 1, turn (there should be a total of 4 sts left uncrocheted on R4, 2 sts on each end. See third image in pic. #15)
R6-8: sc in all 6 sts (6 sts) ch 1, turn (3 rows total at 10 sts each)
R9: dec, sc 2, dec (4 sts) (see fourth image in pic. #15)
Do not finish off. Instead, sl st all the way around the apron to create a neat border (see last two images in pic. #15). There’s no exact st count for this; just go all the way around and do what looks best. Finish off neatly using the invisible finish technique and weave all the ends in.
Apron Straps (Using White Yarn)
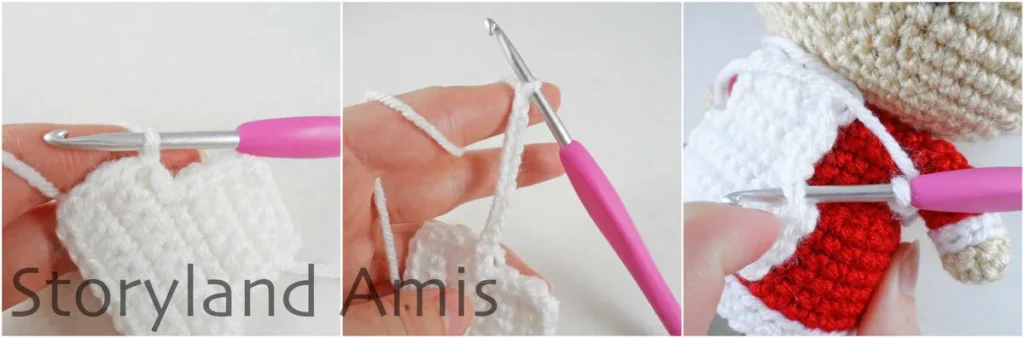
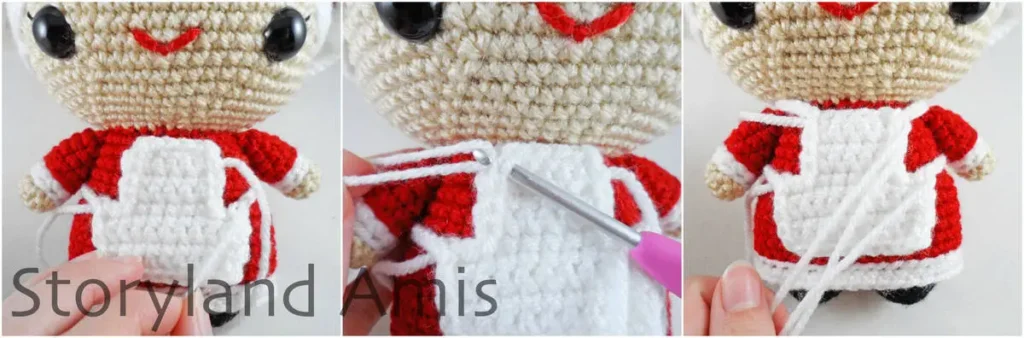
Join the white yarn to the corner edge of R4 of the apron with a sl st and ch approx. 36 (see first two images in pic. #16). You may need to do more or fewer chains depending on how tight you chain. Place the apron on her front and wrap the chain around her back, then join it to the corner edge of the other side of R4 of the apron by making a sl st. Finish off (see fourth image in pic. #16).
Now join the white yarn to the top corner edge of R9 of the apron and ch approx. 35 (see fifth image in pic. #16). Again, you may need to make more or fewer chains depending on your tension. Wrap the chain around her neck and join it to the other corner edge of R9 with a sl st (see last image in pic. #16). Finish off by making a sl st and weave in all loose ends.
Finishing Touches
Now that Mrs. Claus is done, you can make her even more adorable by adding a little blush to her cheeks! Try using real makeup/blush or a Waldorf rouge crayon and rubbing it on her cheeks. I used real blush for mine!
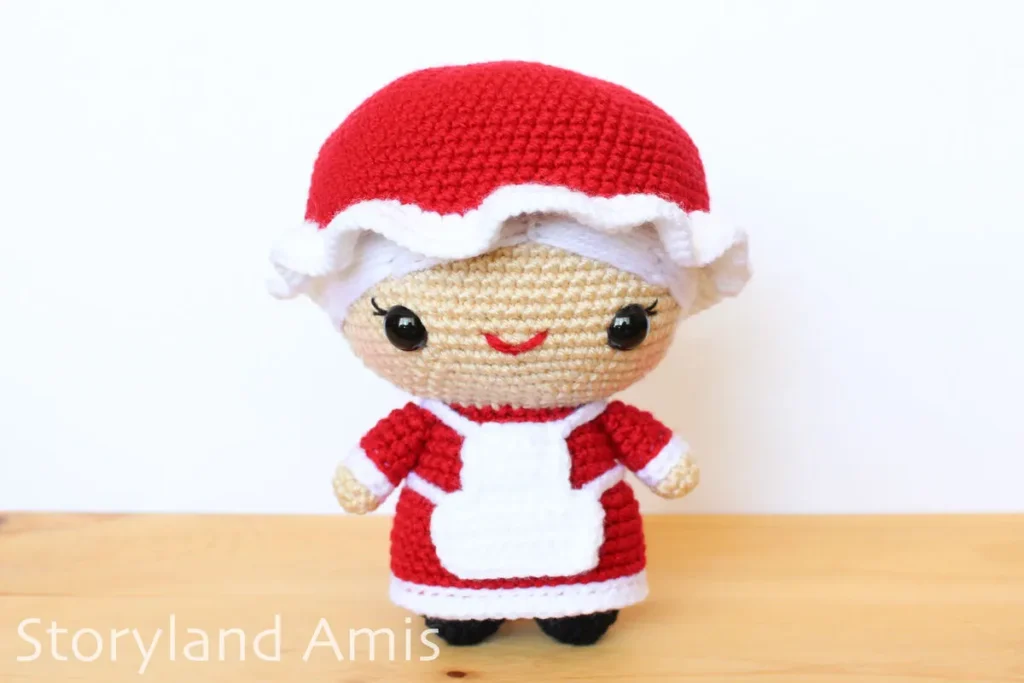
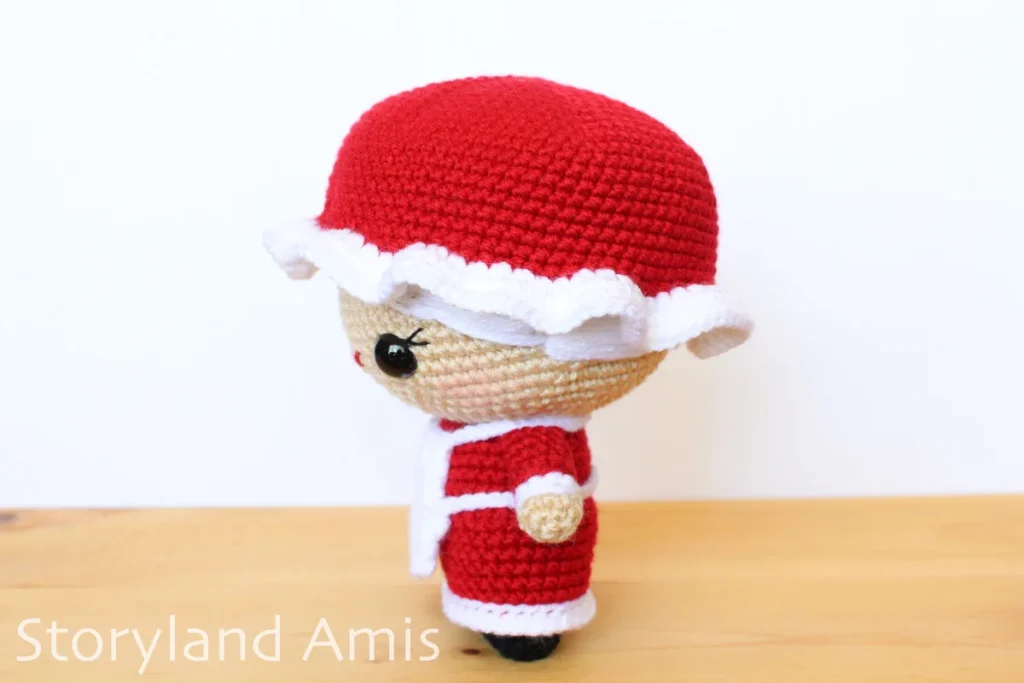
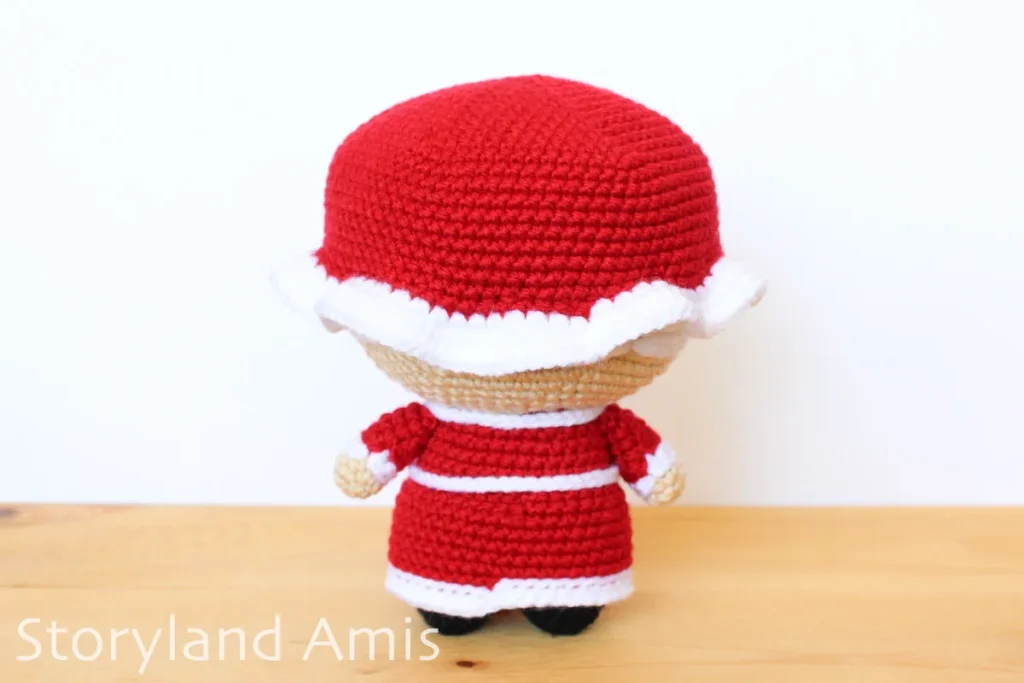
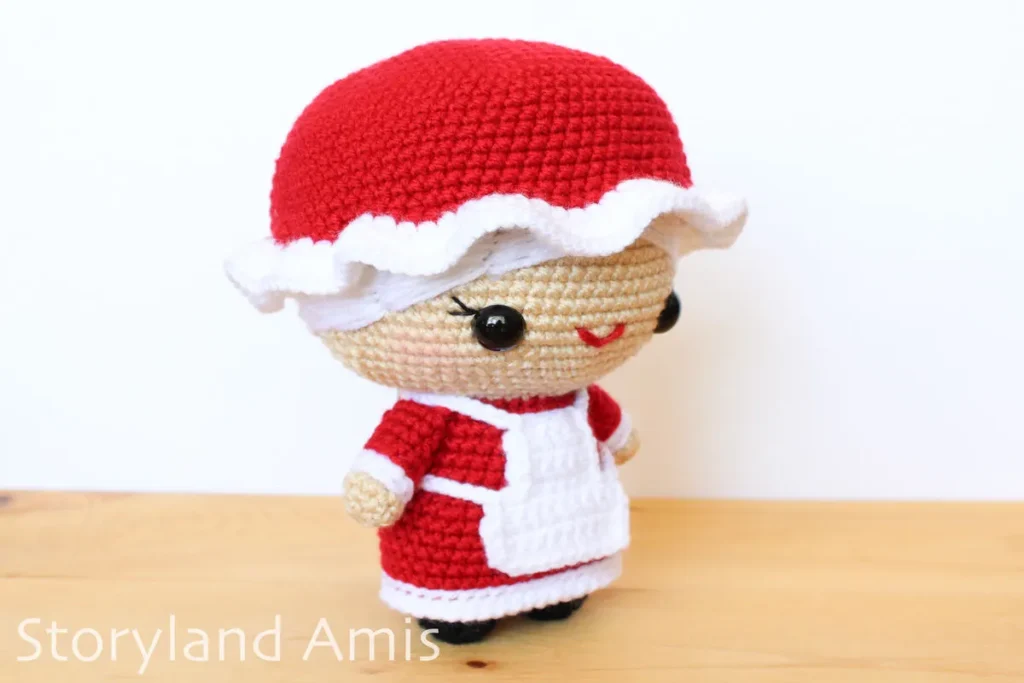
Congratulations—you’re done! I hope you enjoyed making this free Mrs. Claus amigurumi pattern. I would love to see pictures of your finished project!
Please feel free to leave a comment down below with any questions or comments you have about this pattern. I always try to respond personally to all comments!
If you make this free Mrs. Claus amigurumi pattern, share your creations with me via social media or email me directly! You can find me on Instagram (@storyland_amis) and Facebook (Storyland Amis).
Thanks for stopping by! Until next time, then – stay crafty!
I hope you enjoy making this adorable Mrs. Claus pattern! Make sure to check out Santa’s pattern too so they can keep each other company. Feel free to ask any questions!